


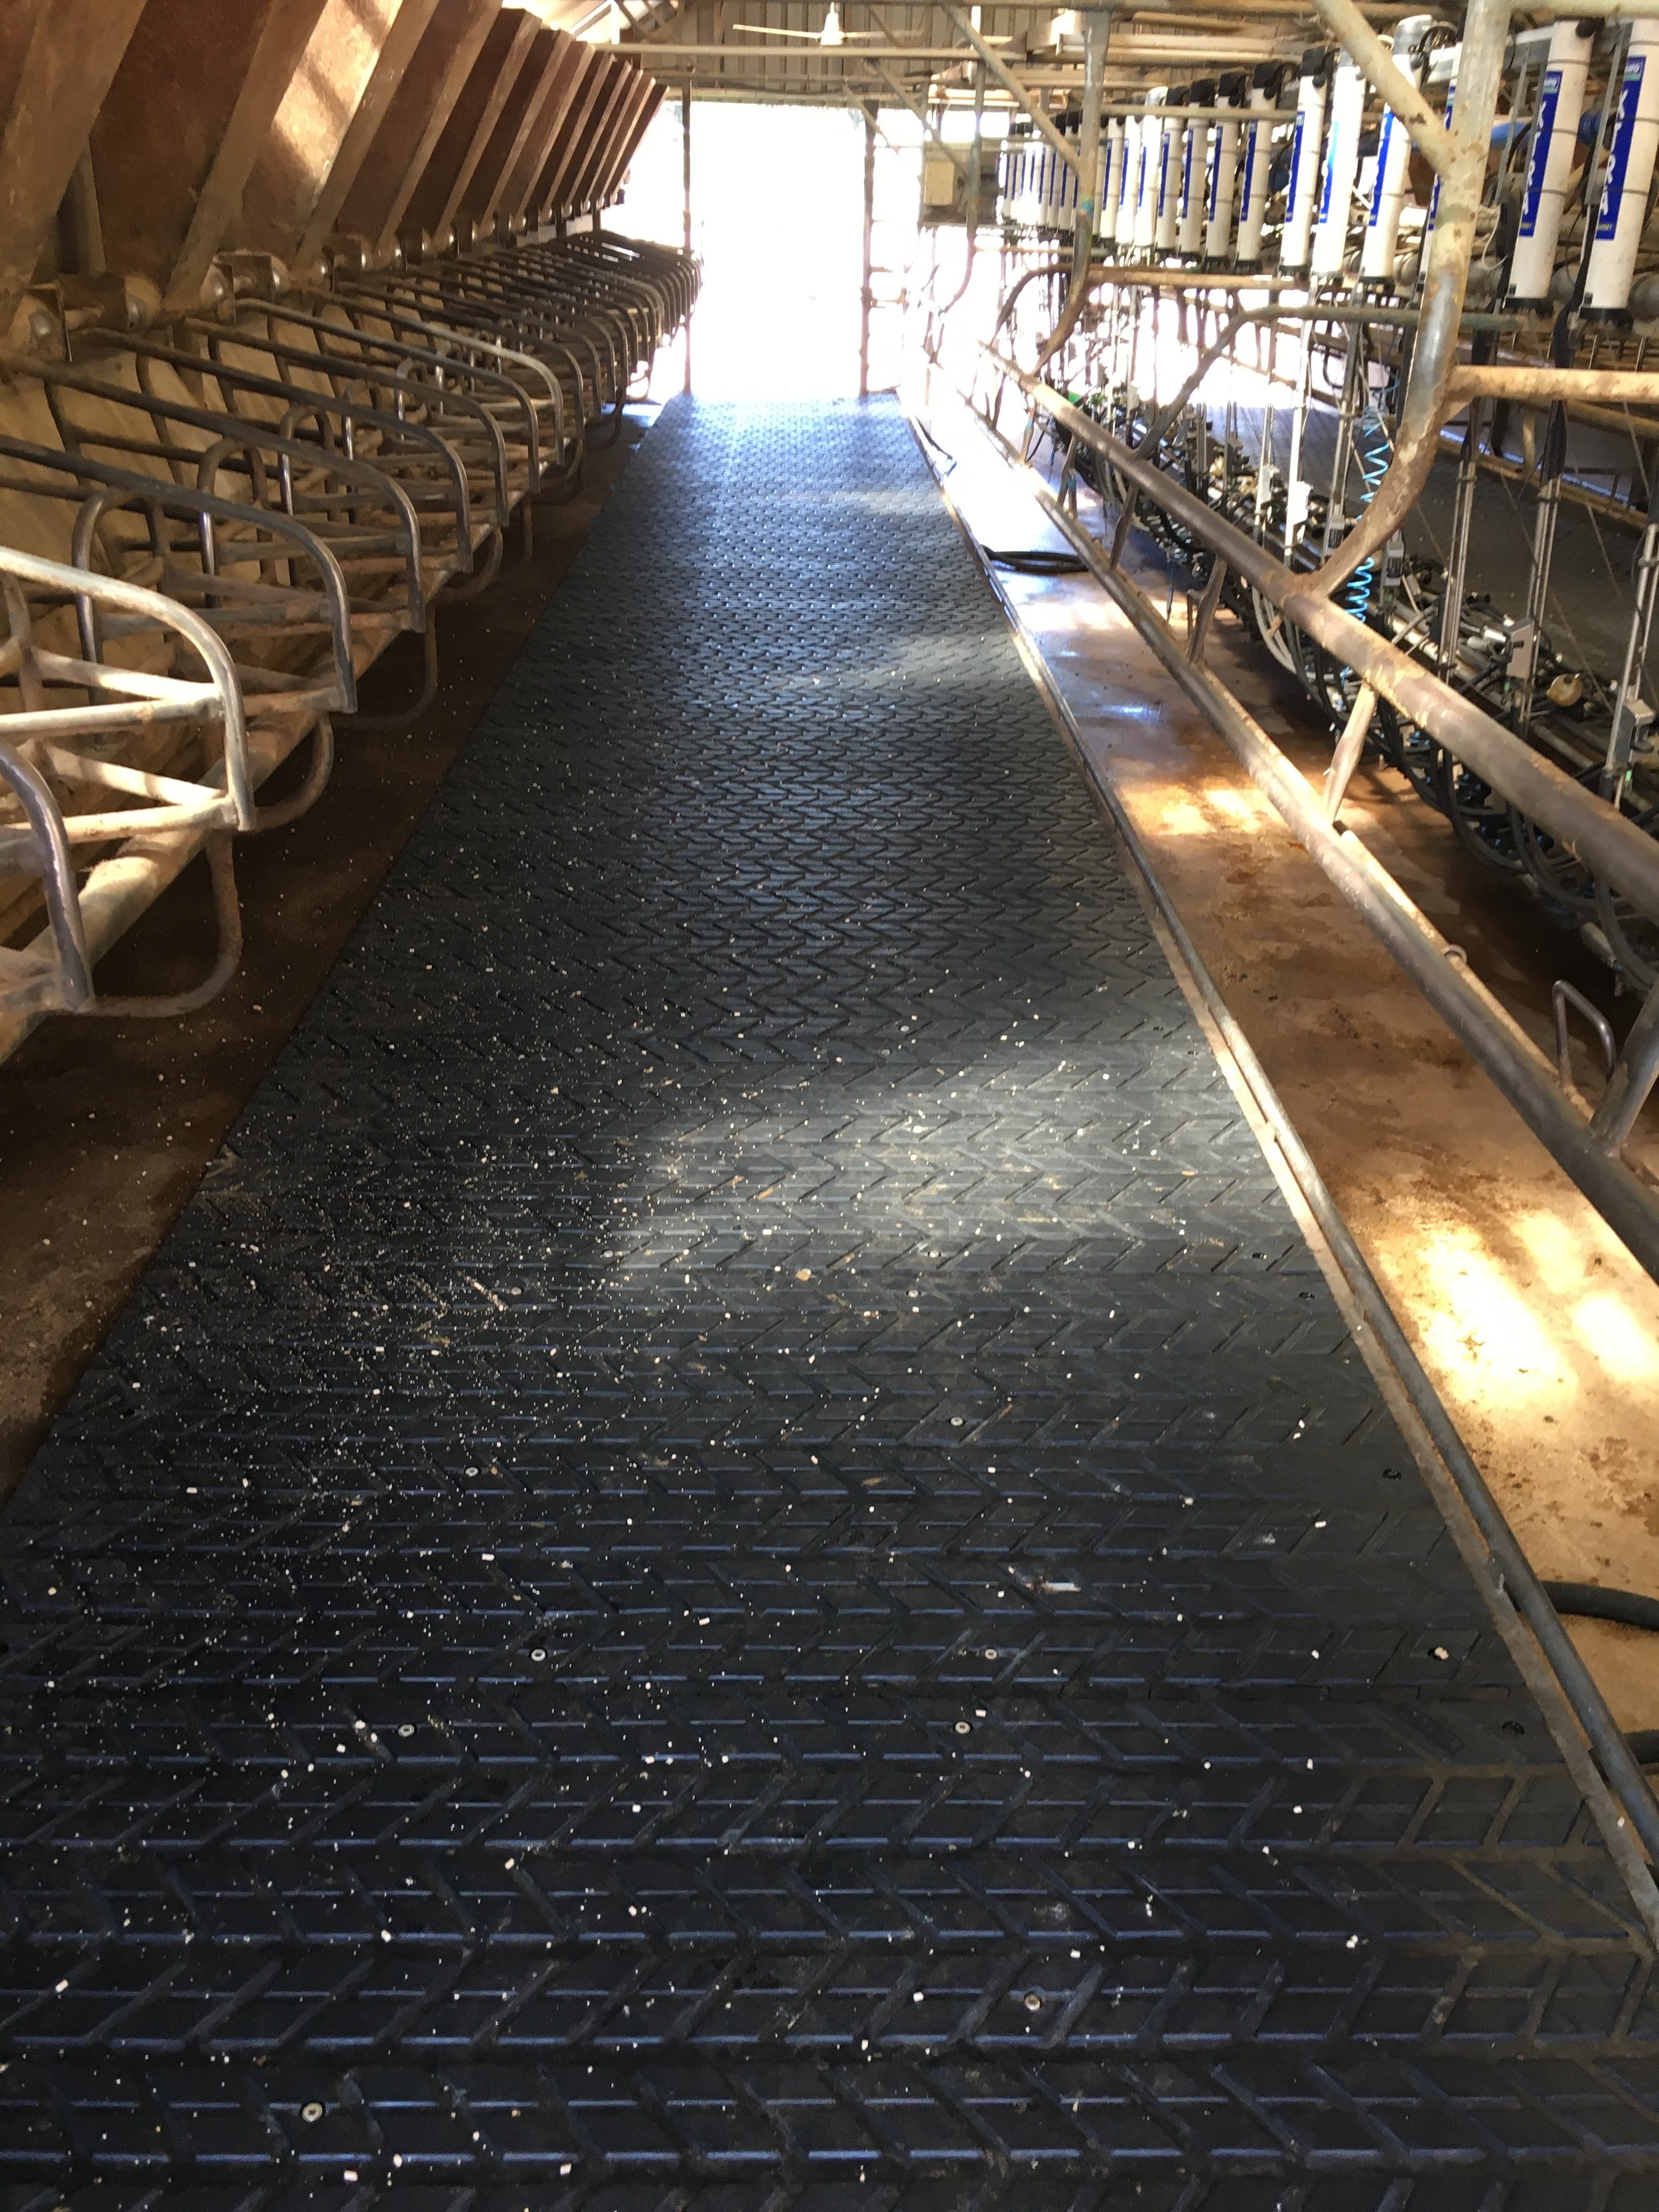
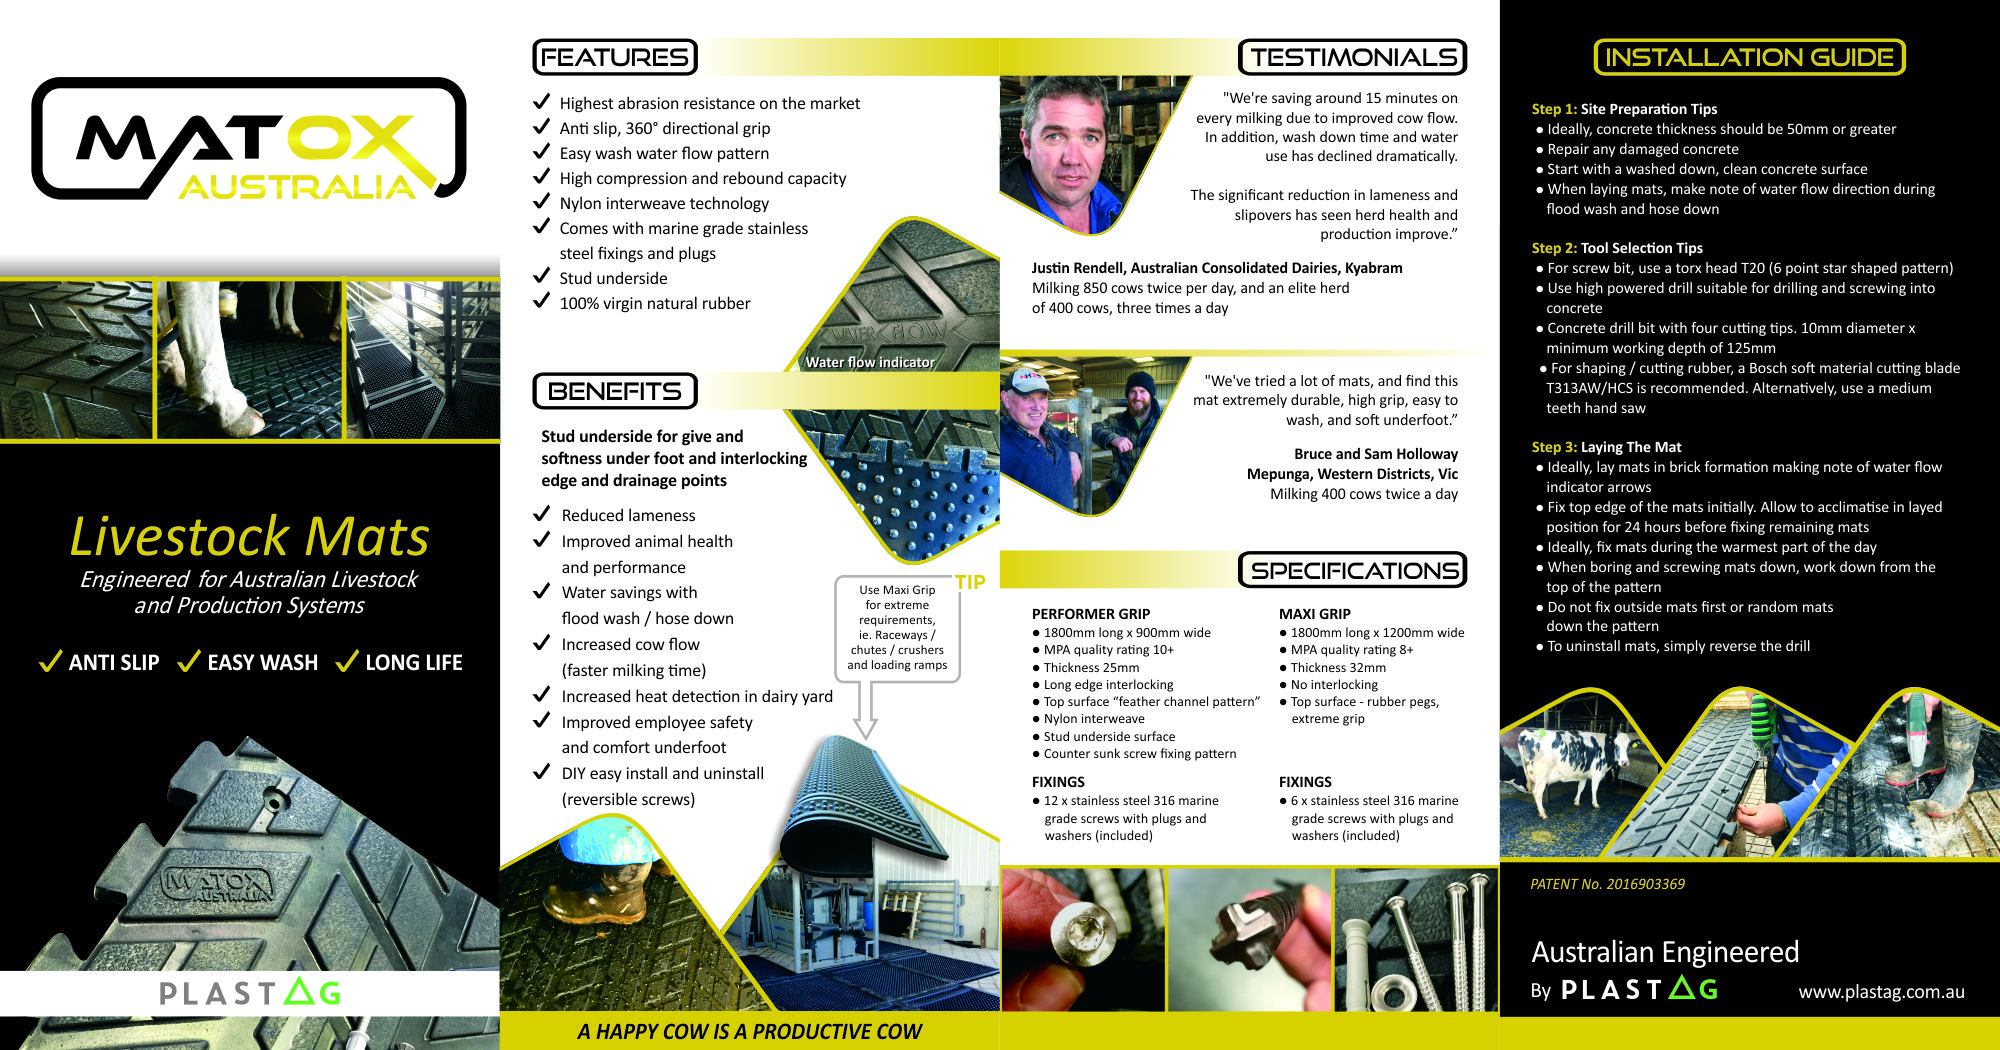
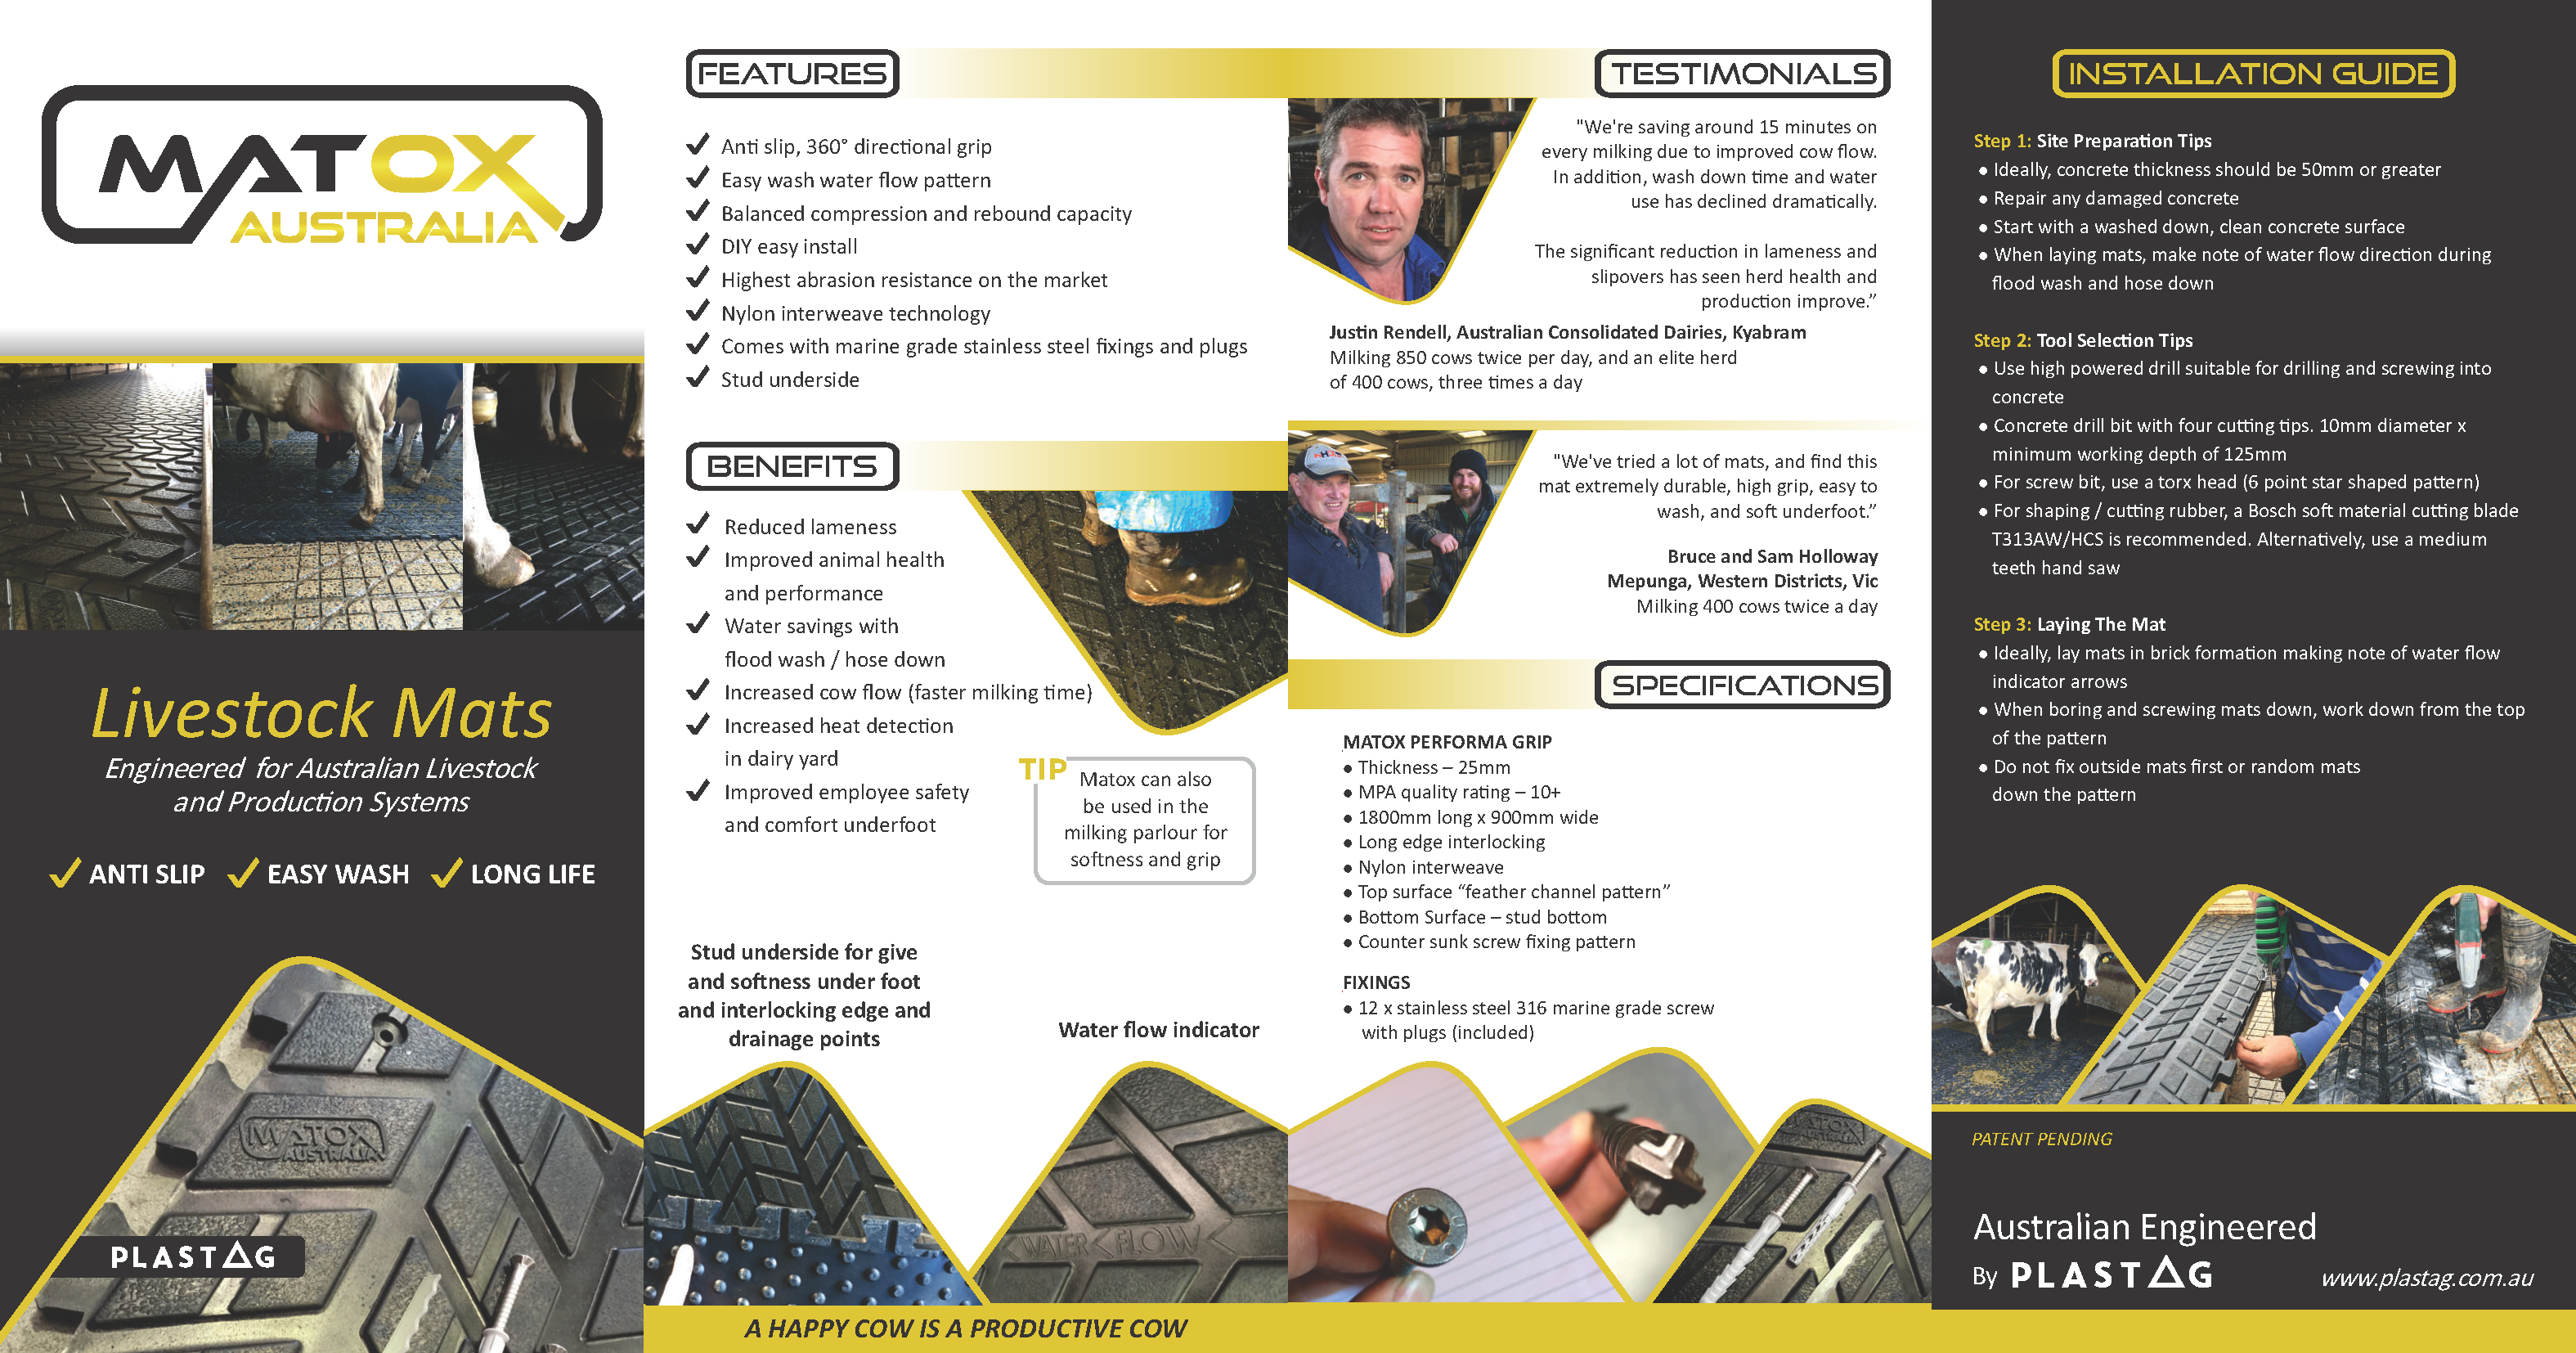
Matox Livestock Mats
Engineered for Australian Livestock and Production Systems
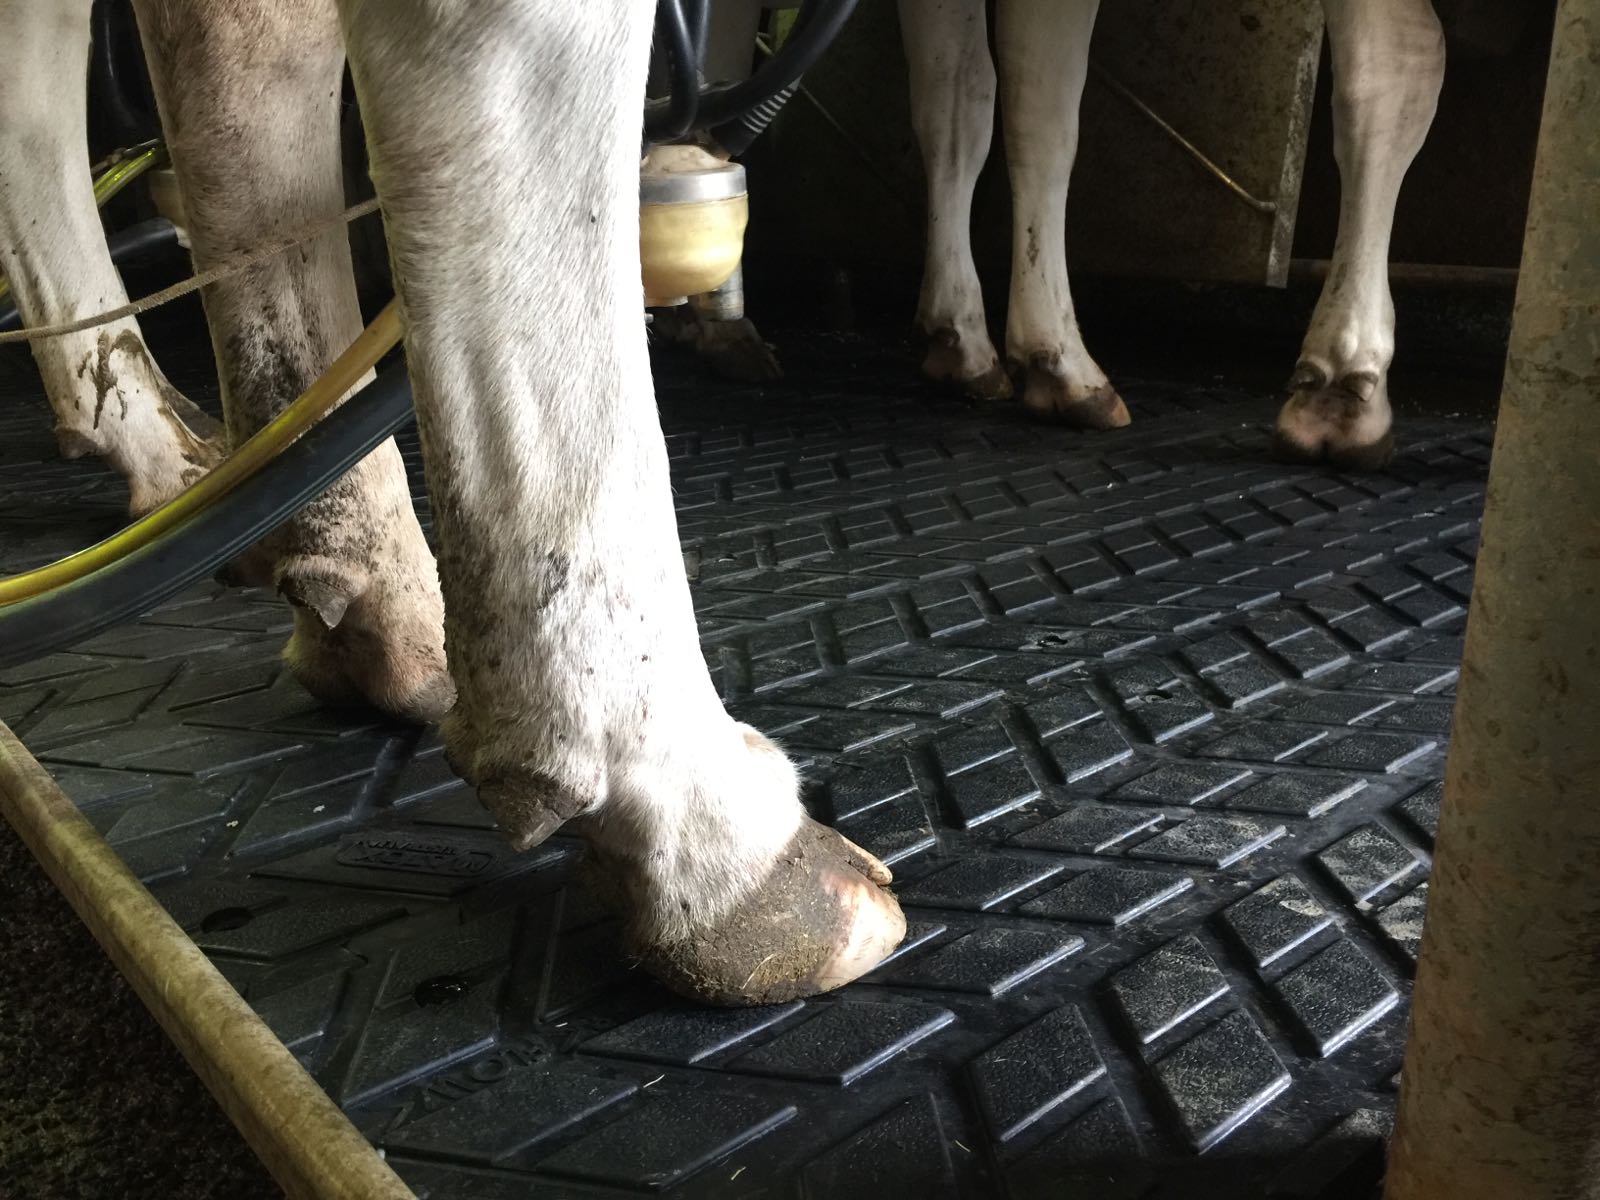
Anti Slip Easy Wash Long Life
Scroll down to request a free sample of our Matox Livestock Mat
Matox Features:
Highest abrasion resistance on the market
Anti slip, 360 degree directional grip
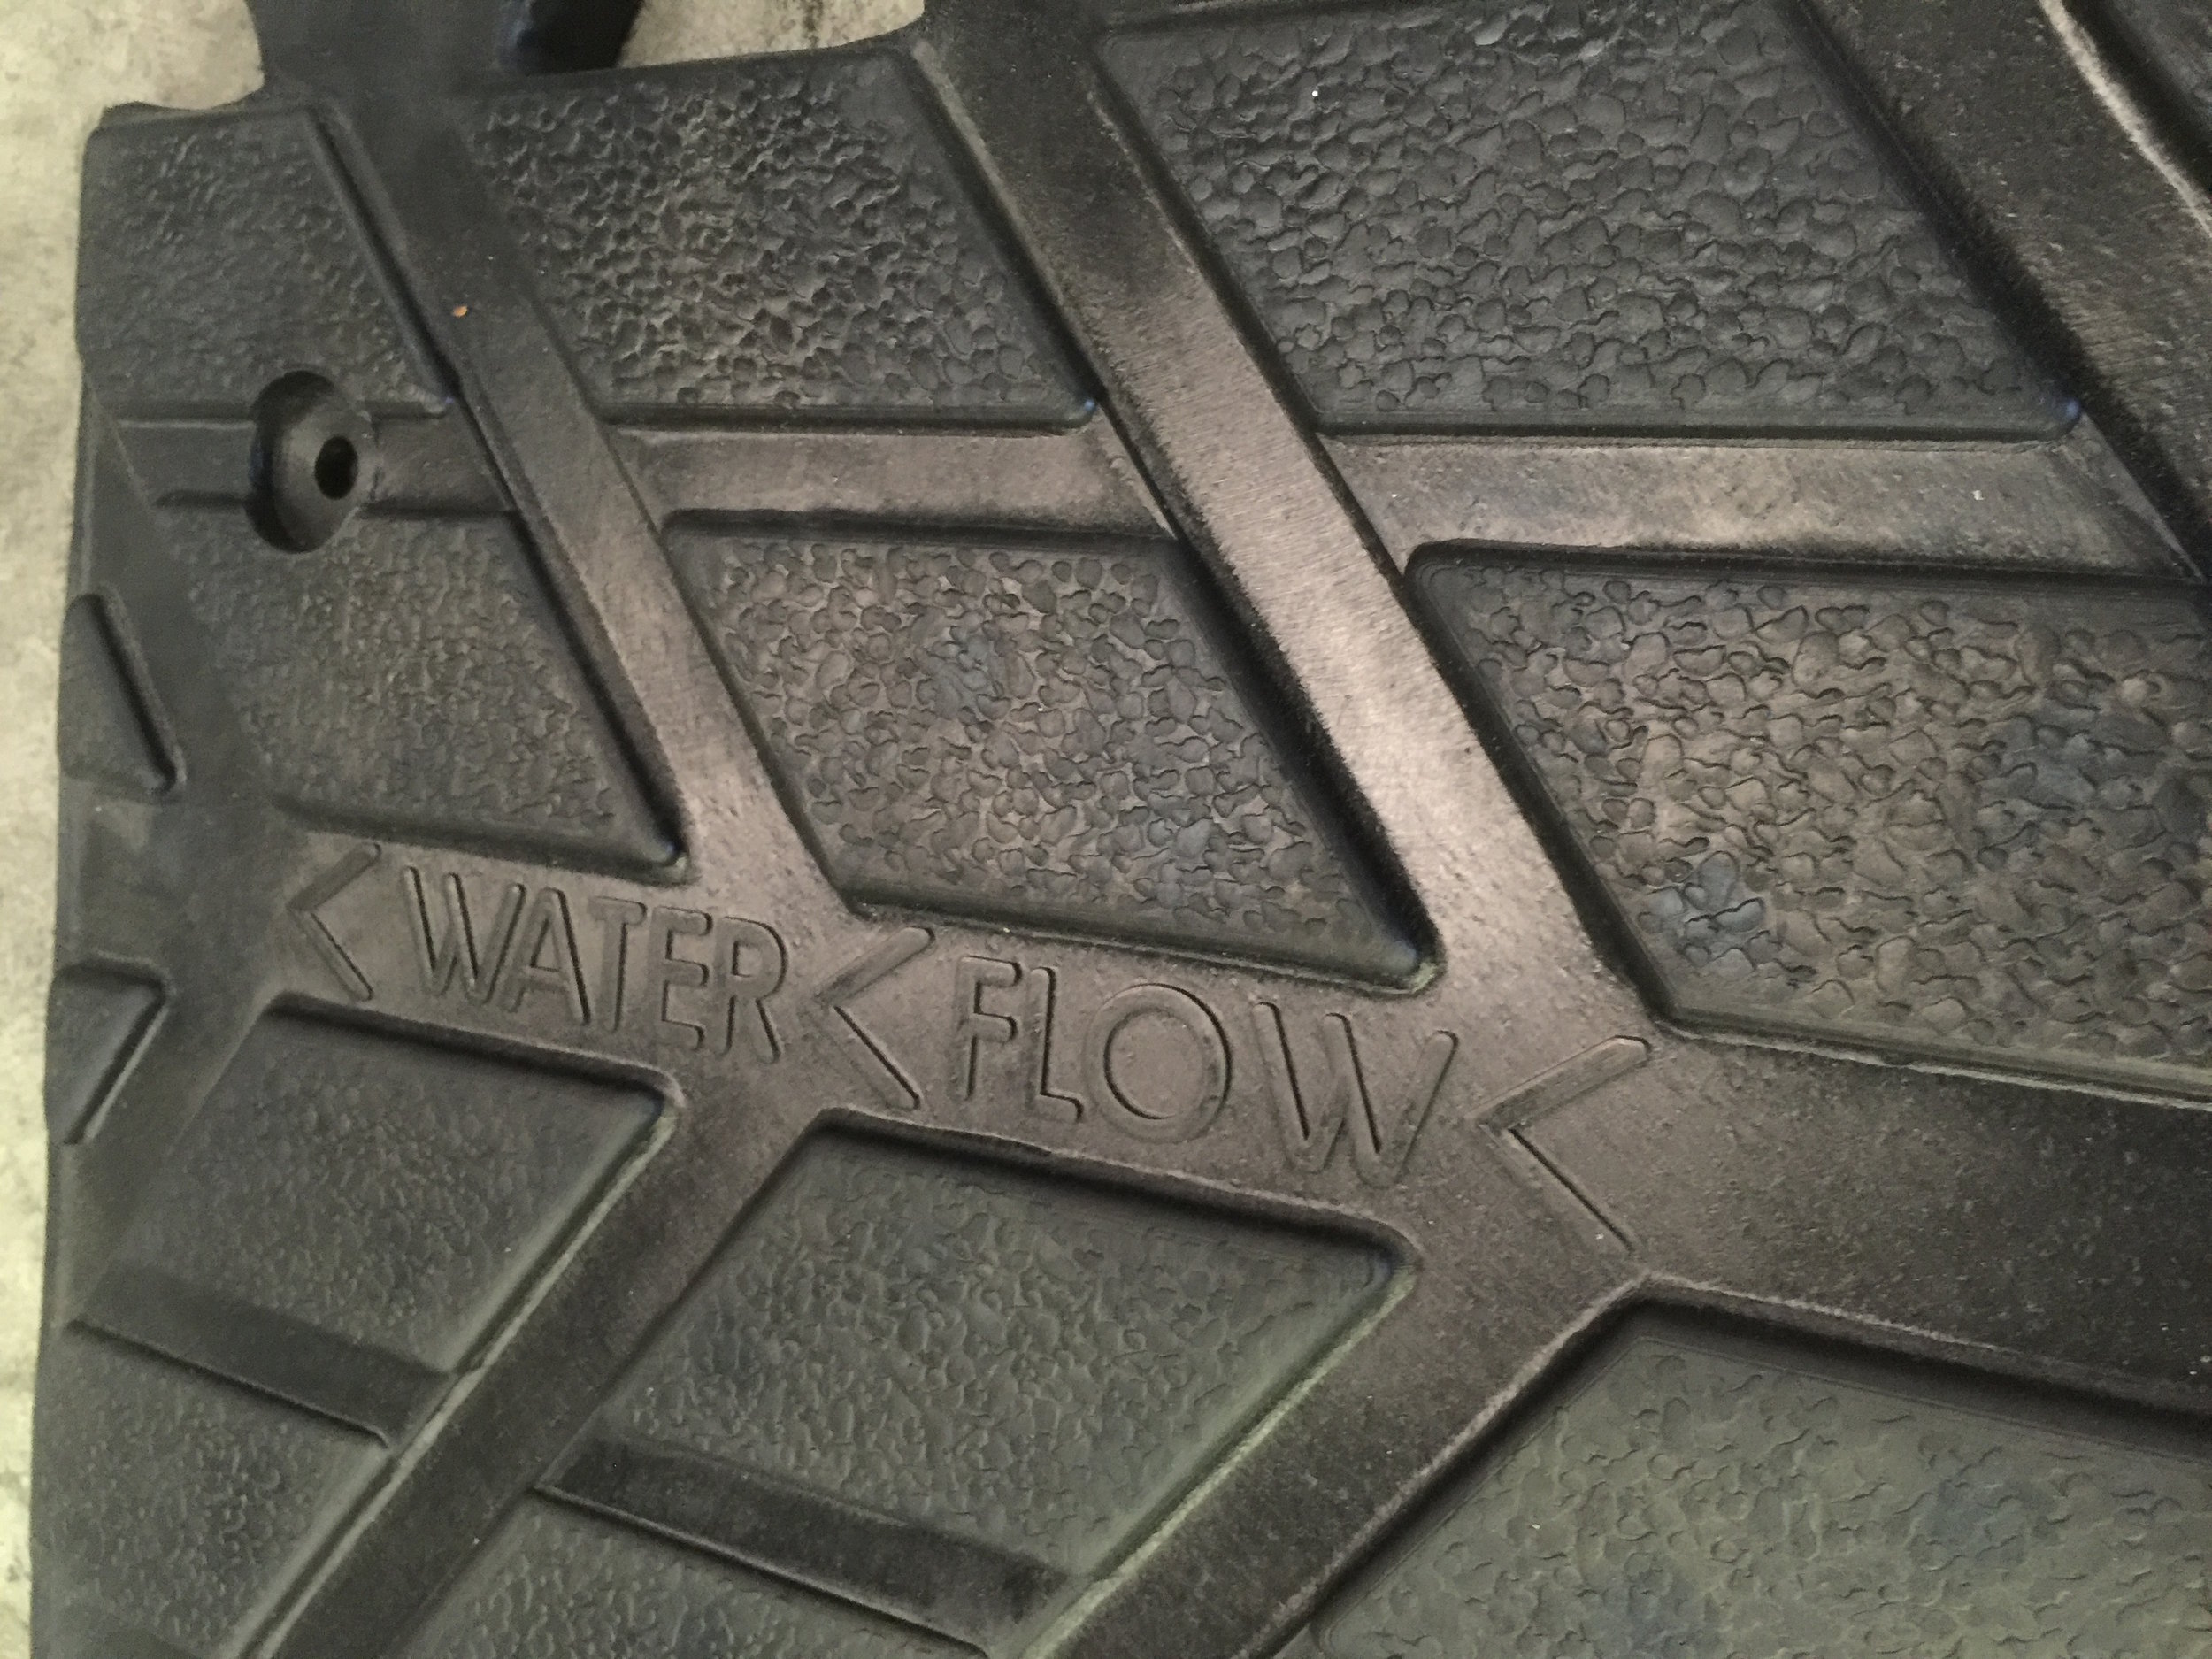
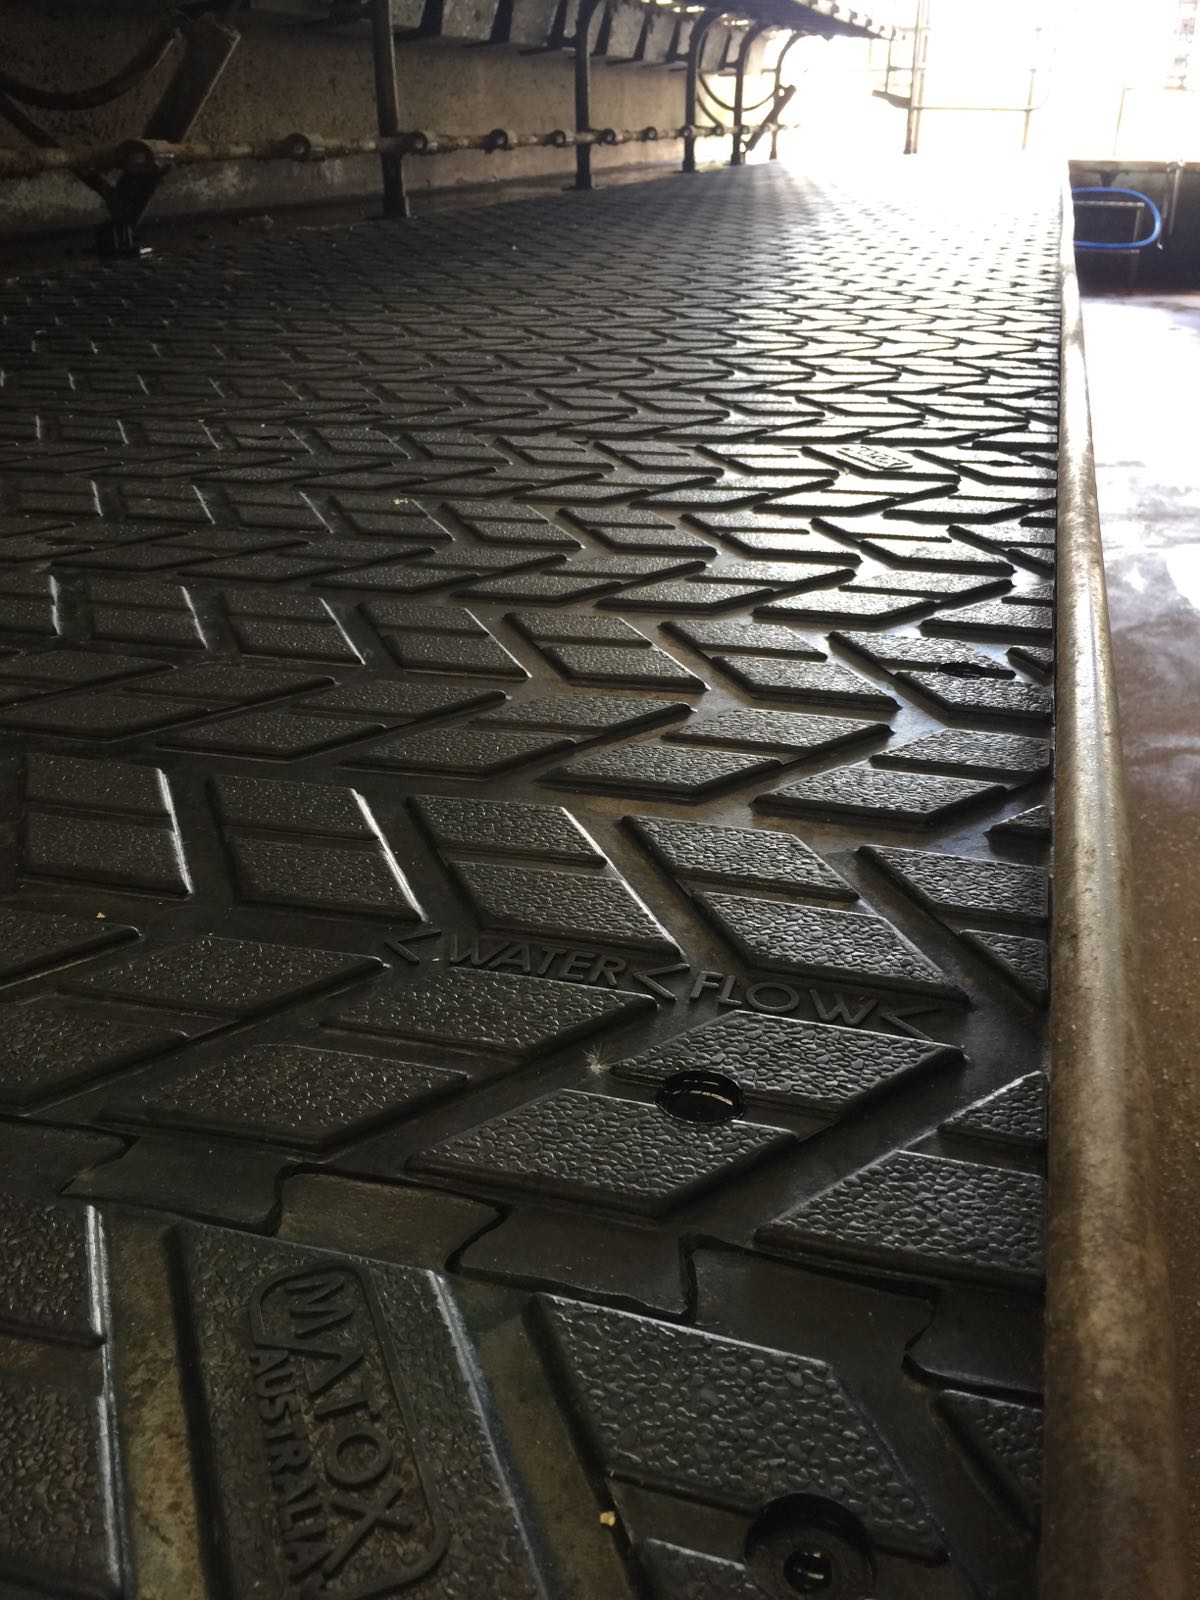
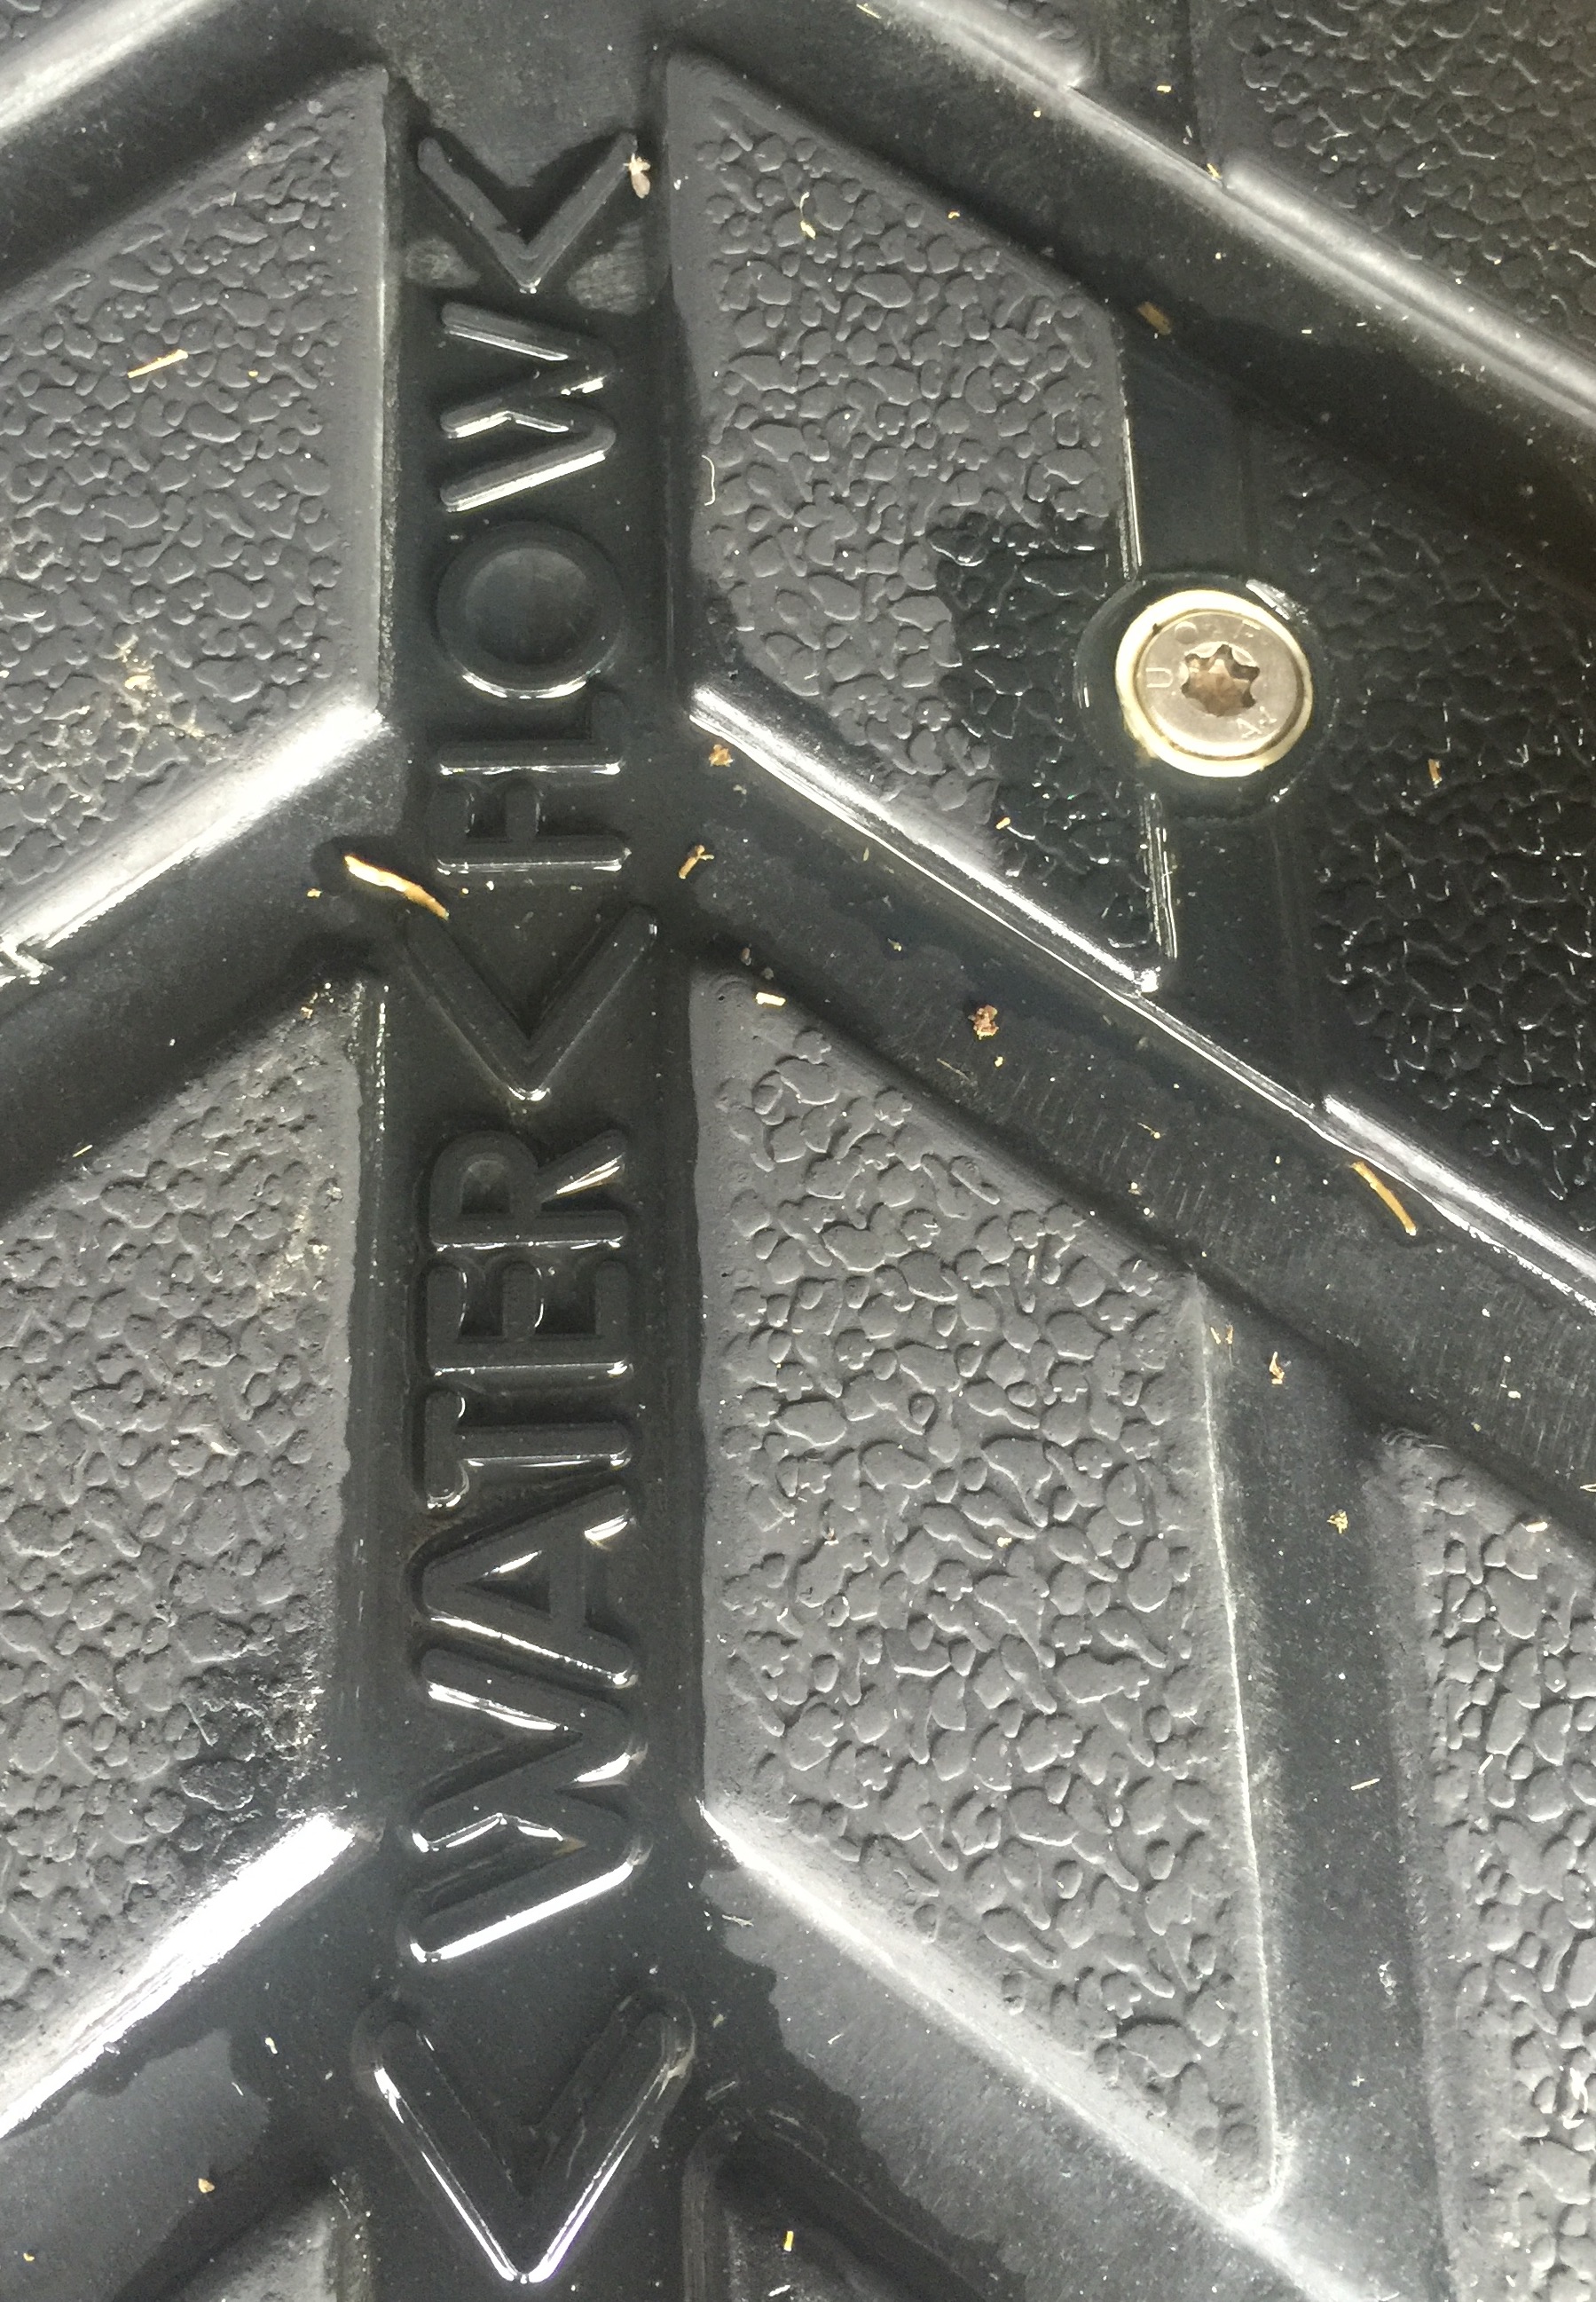
Easy wash water flow pattern
High compression and rebound capacity
Nylon interweave technology
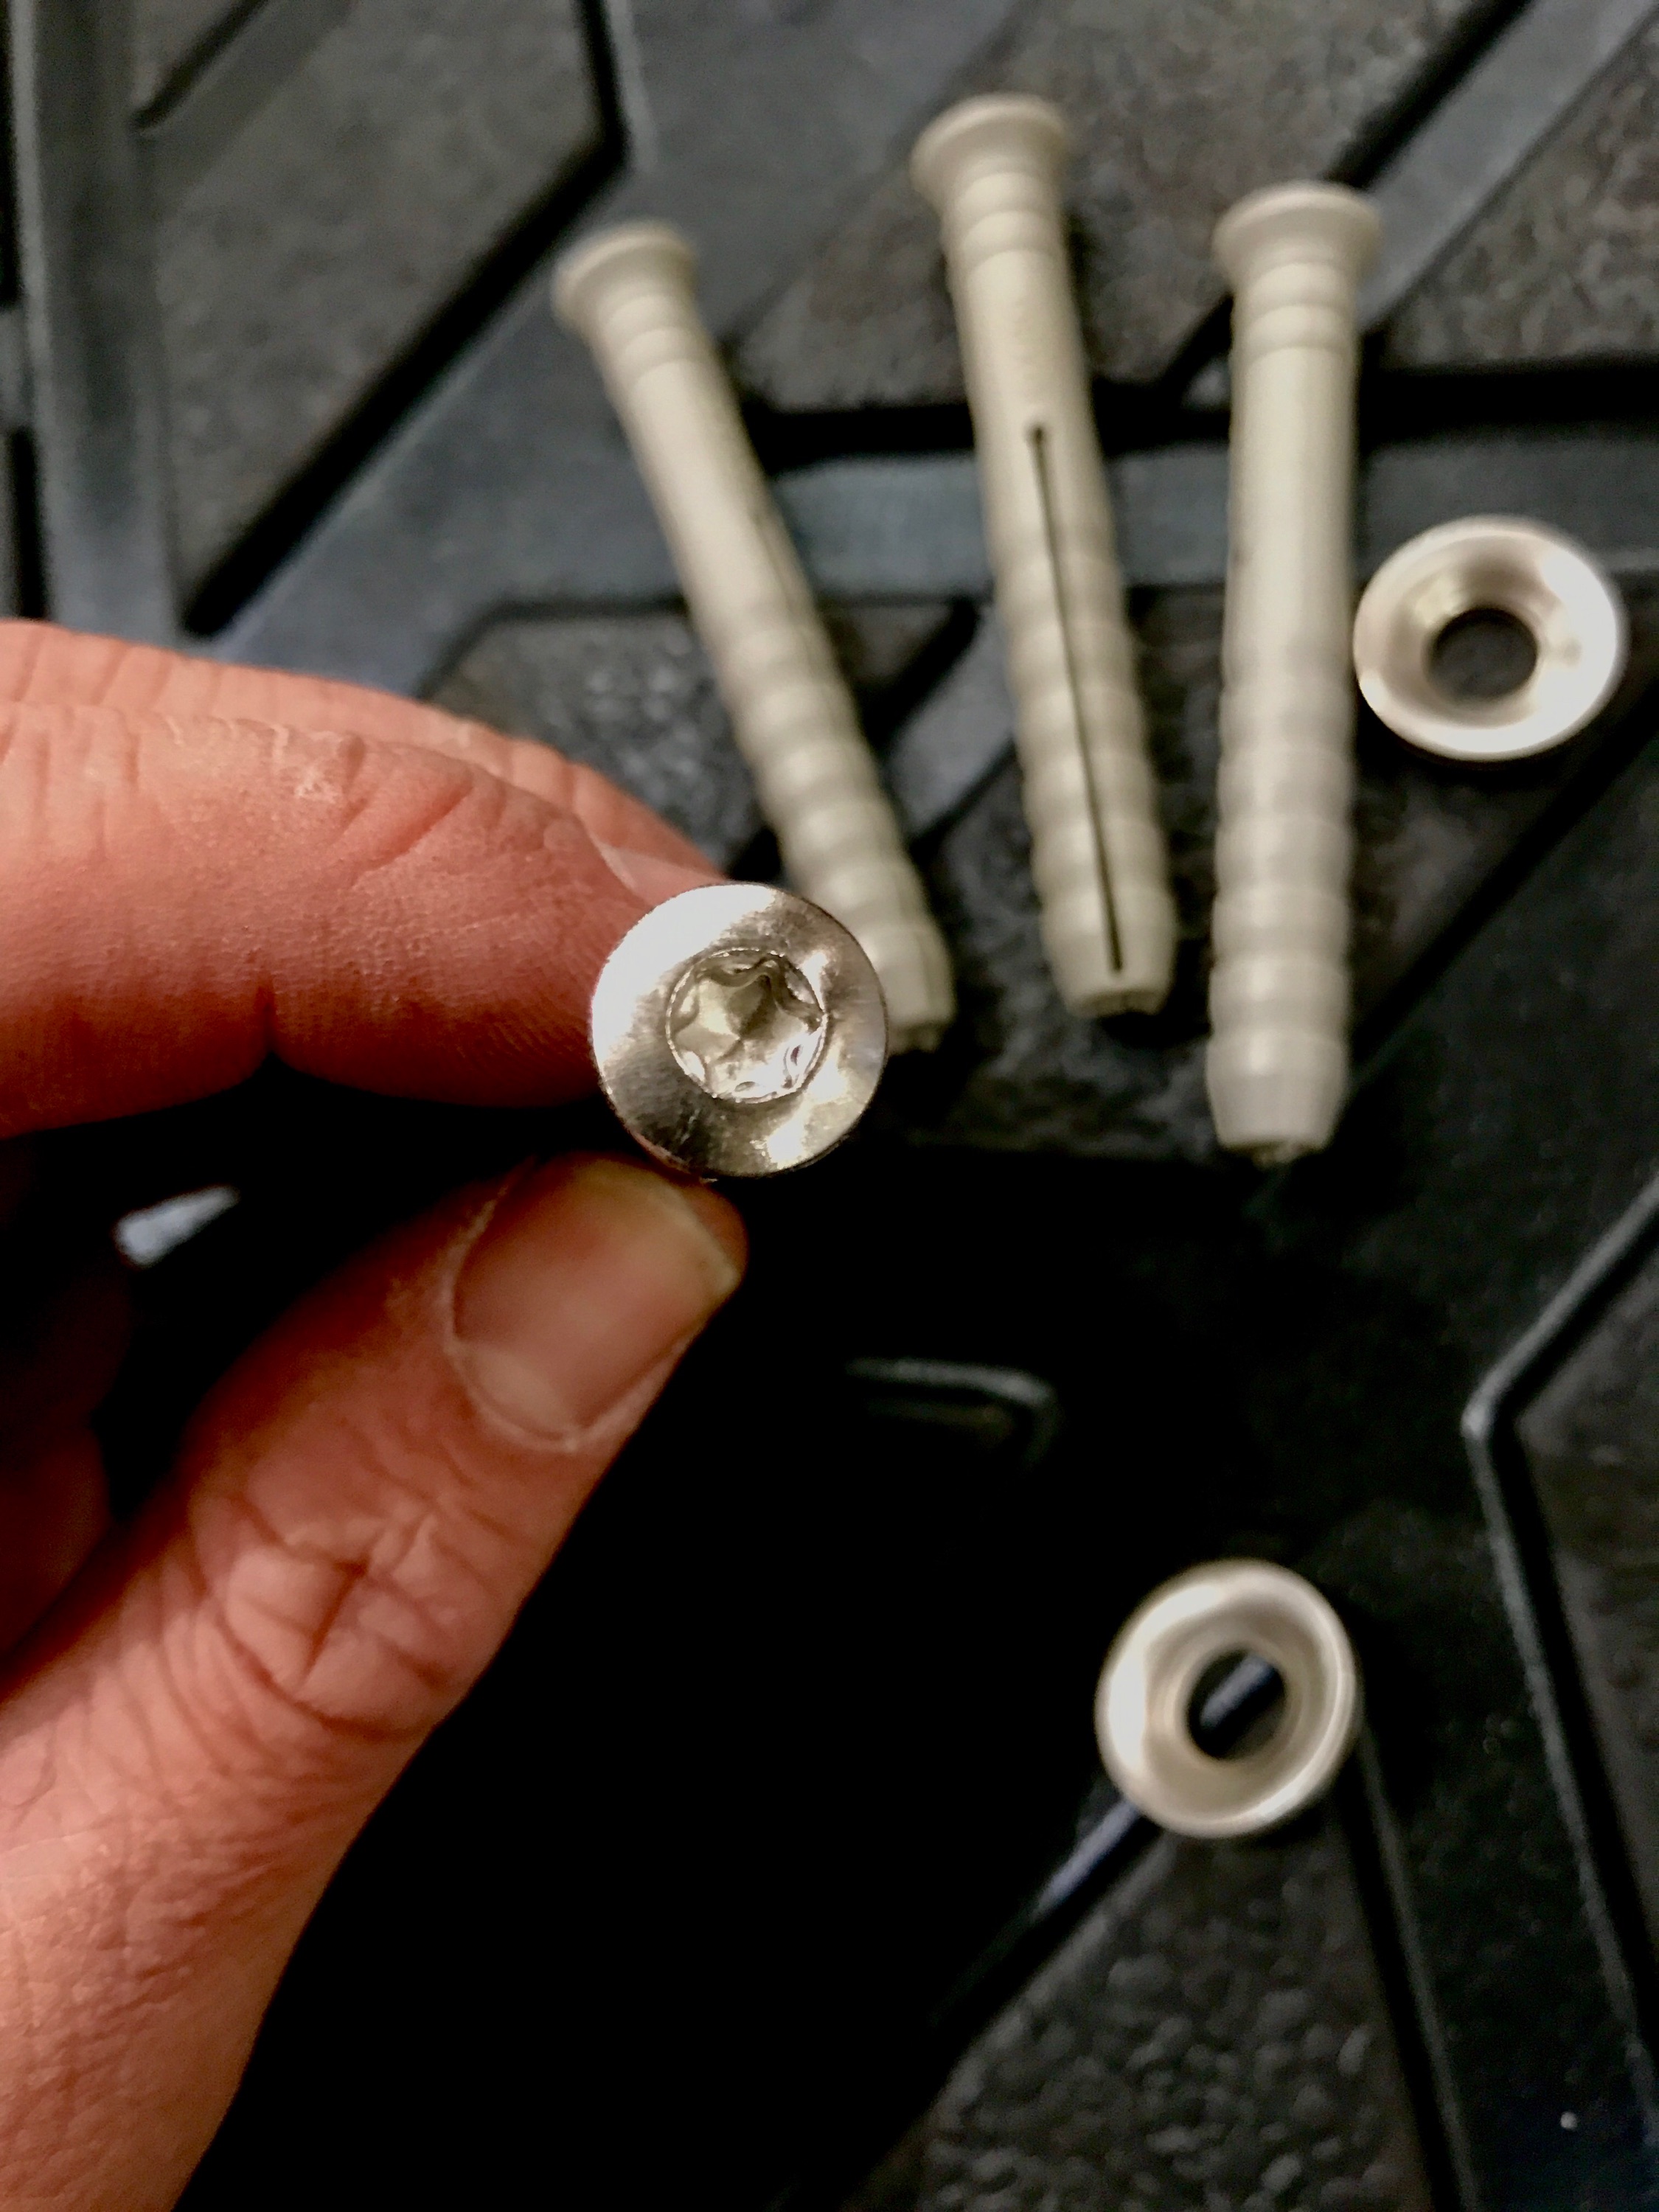
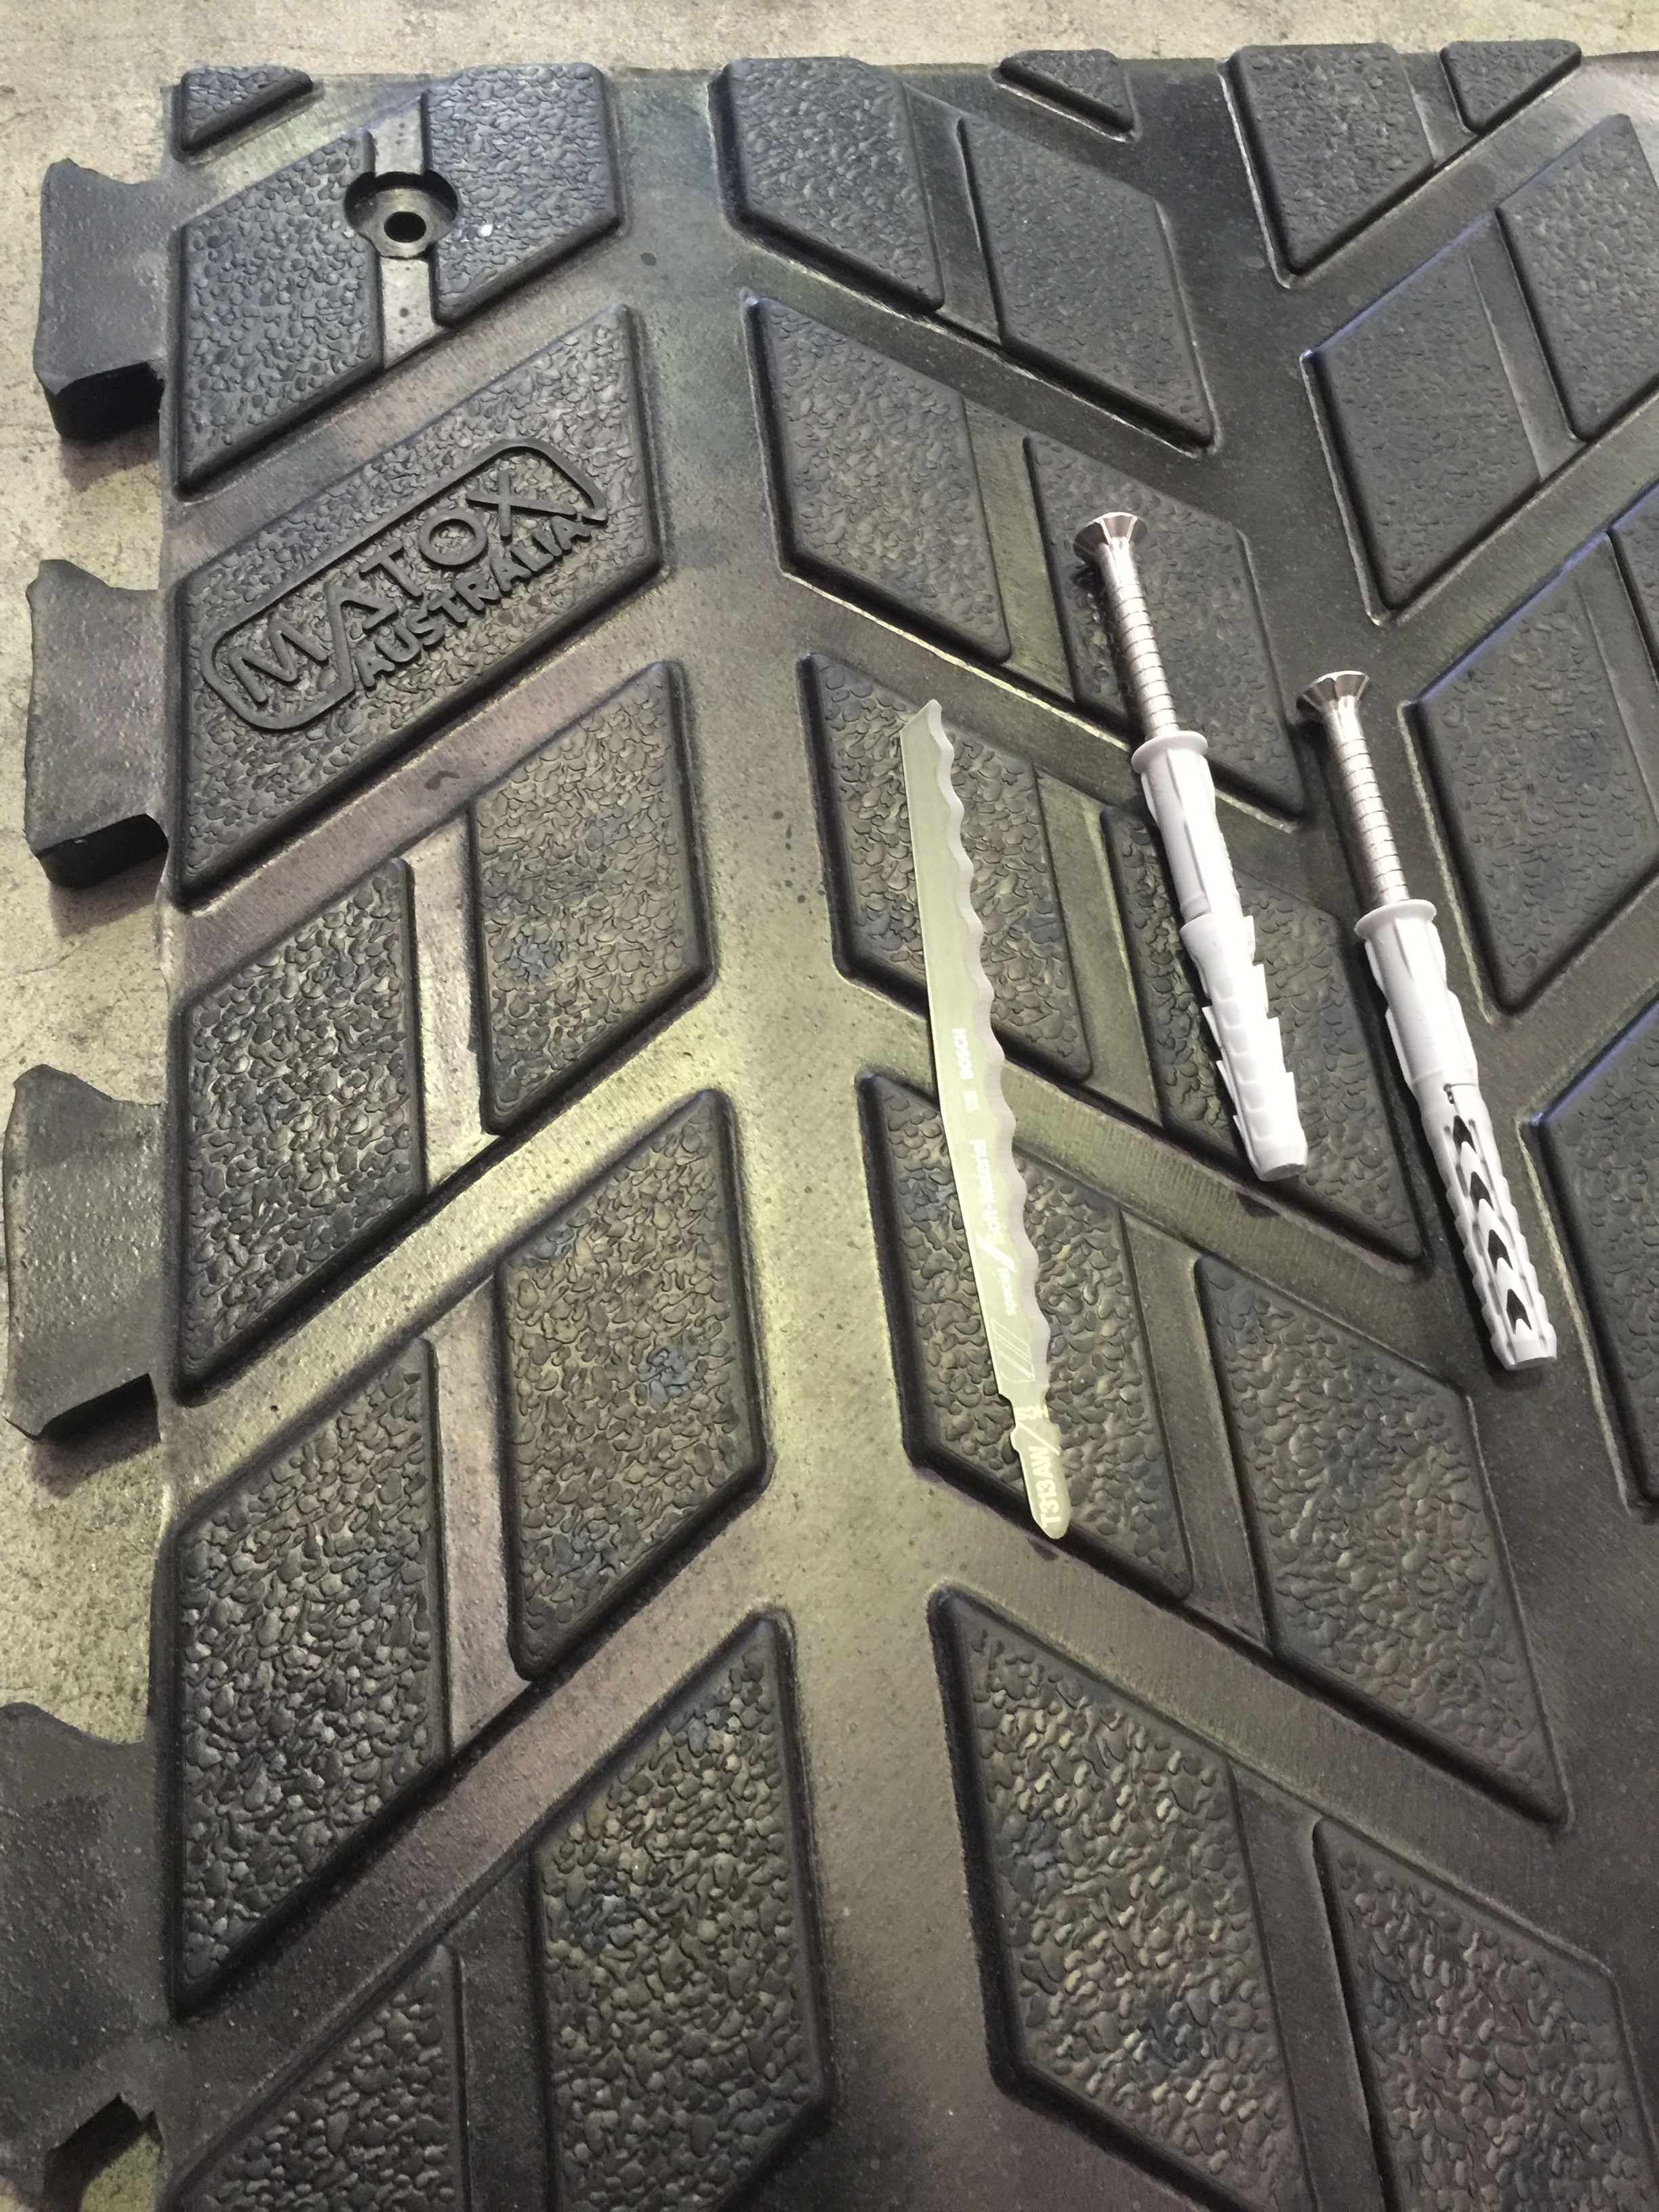
Comes with marine grade stainless steel fixings with plugs and washers
Stud underside
100% virgin natural rubber
Matox Benefits:
Stud underside for give and softness underfoot
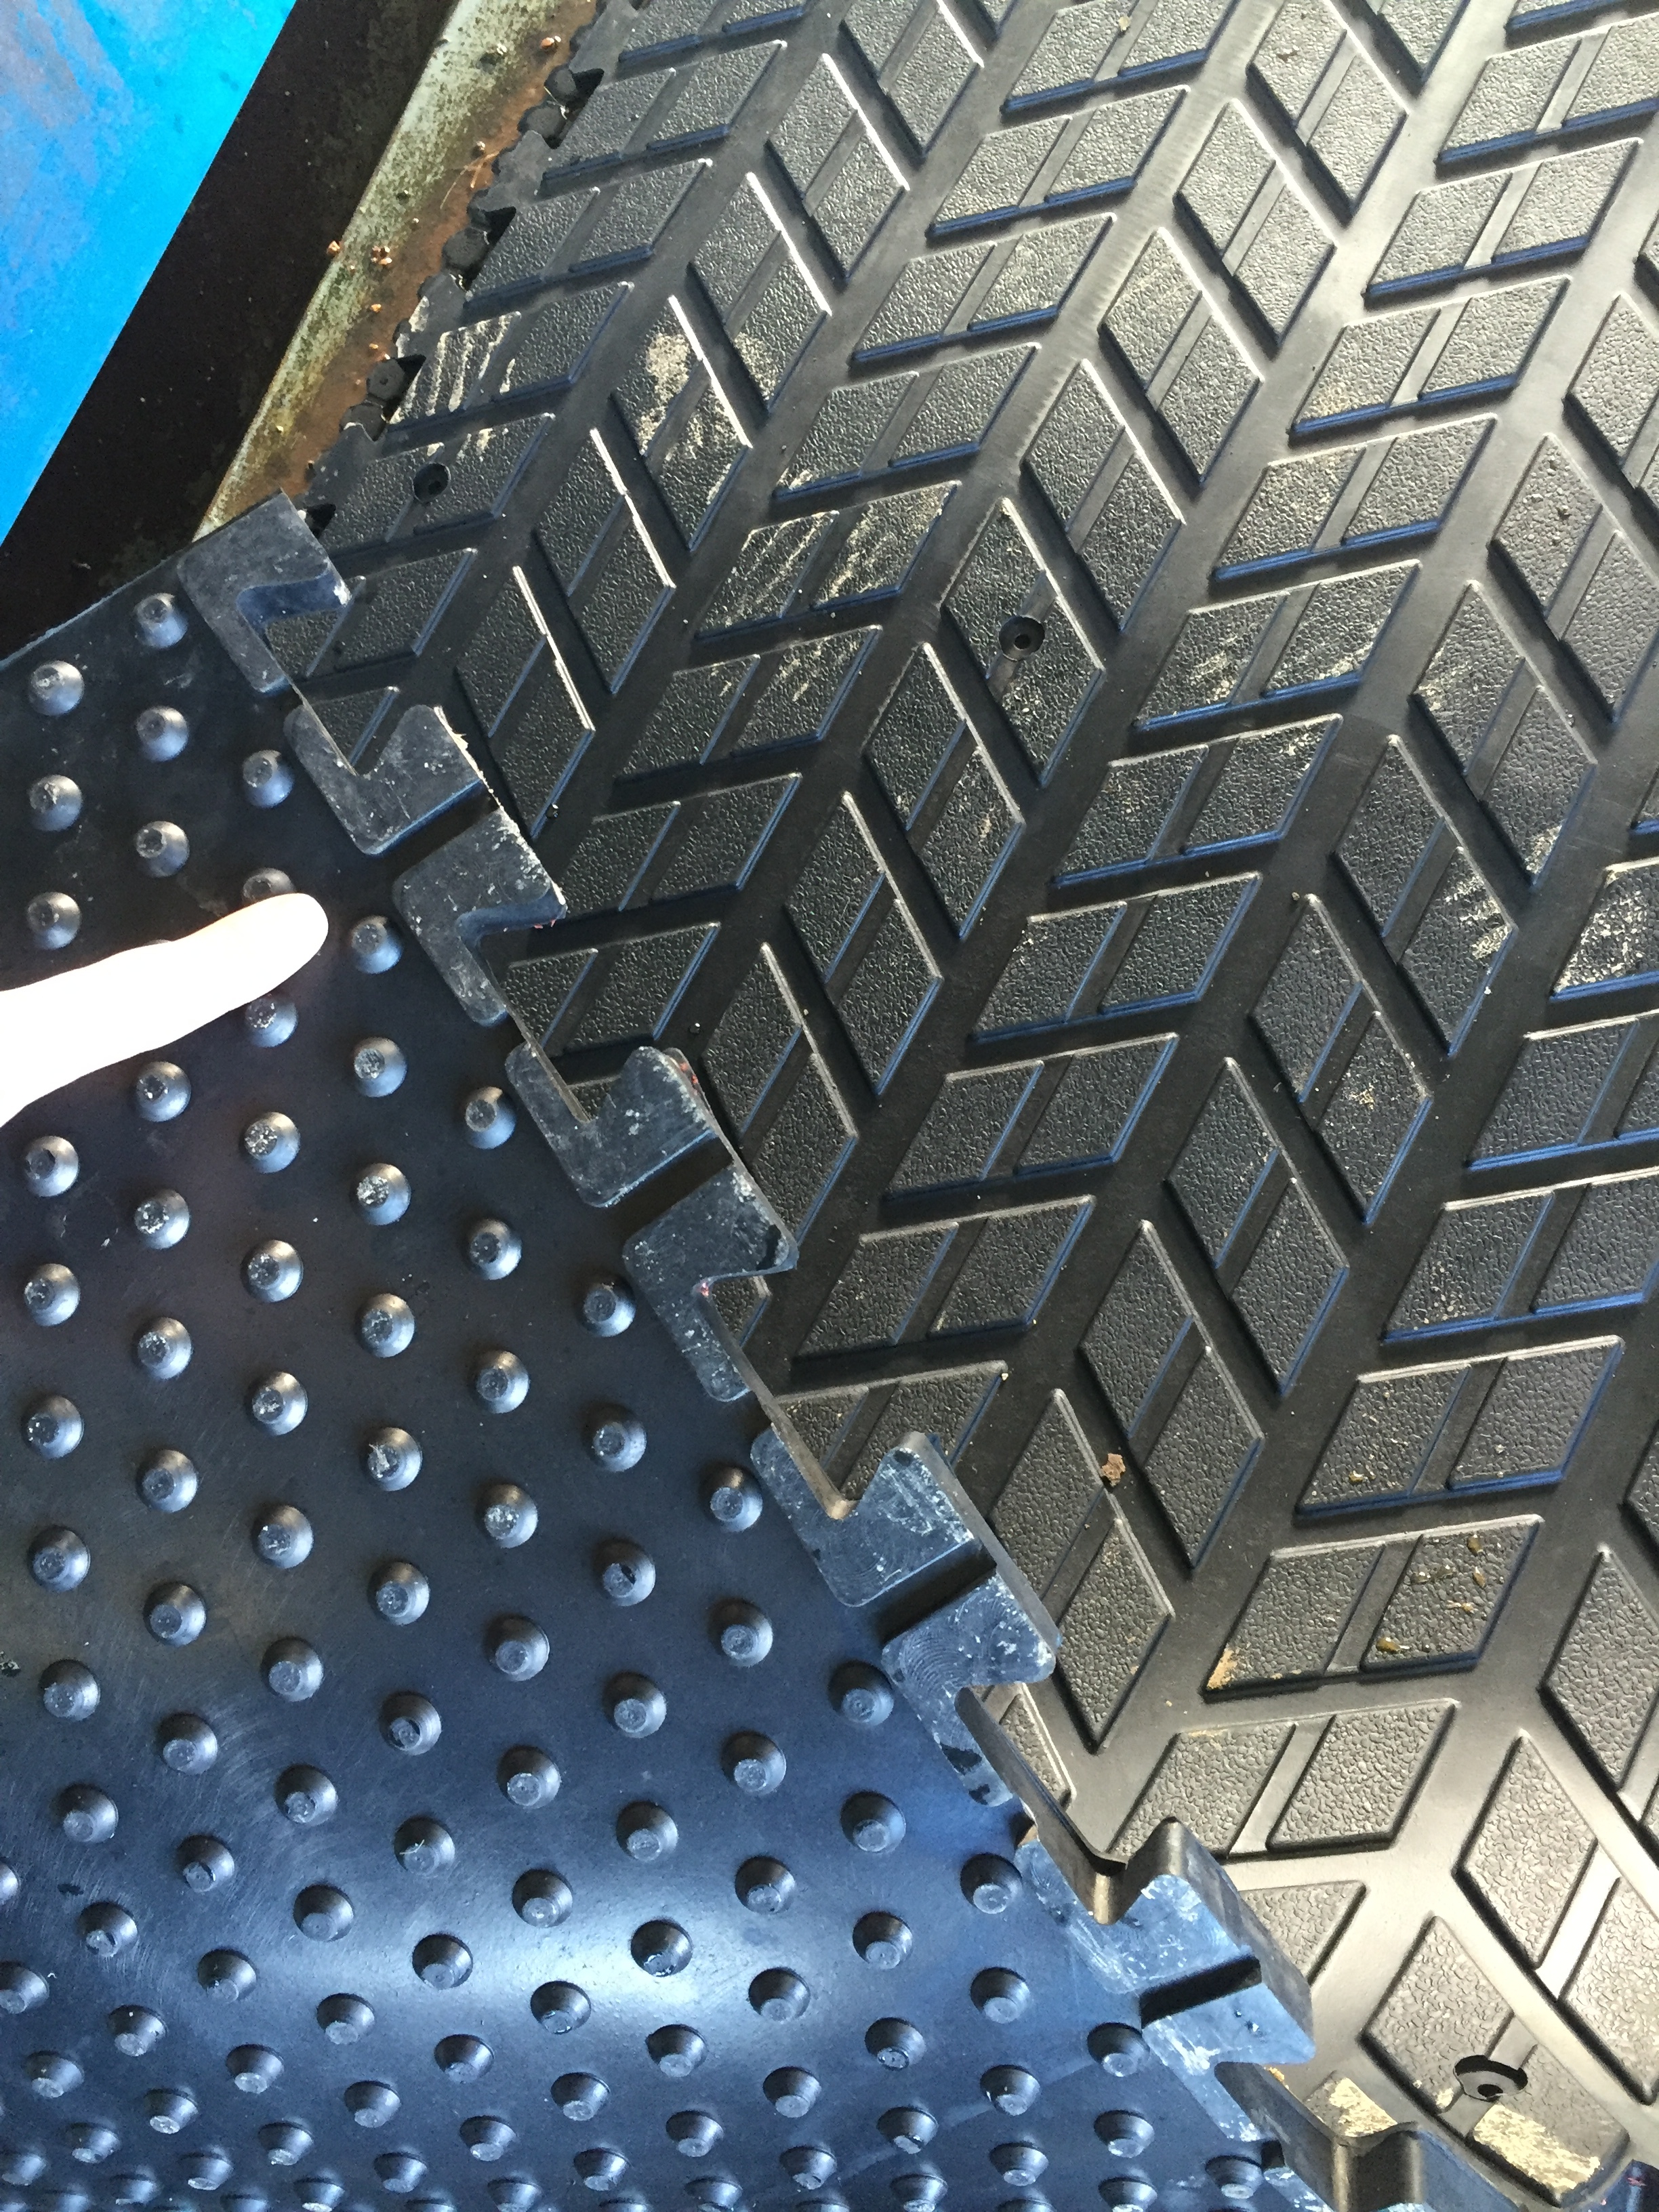
Interlocking edge and drainage points
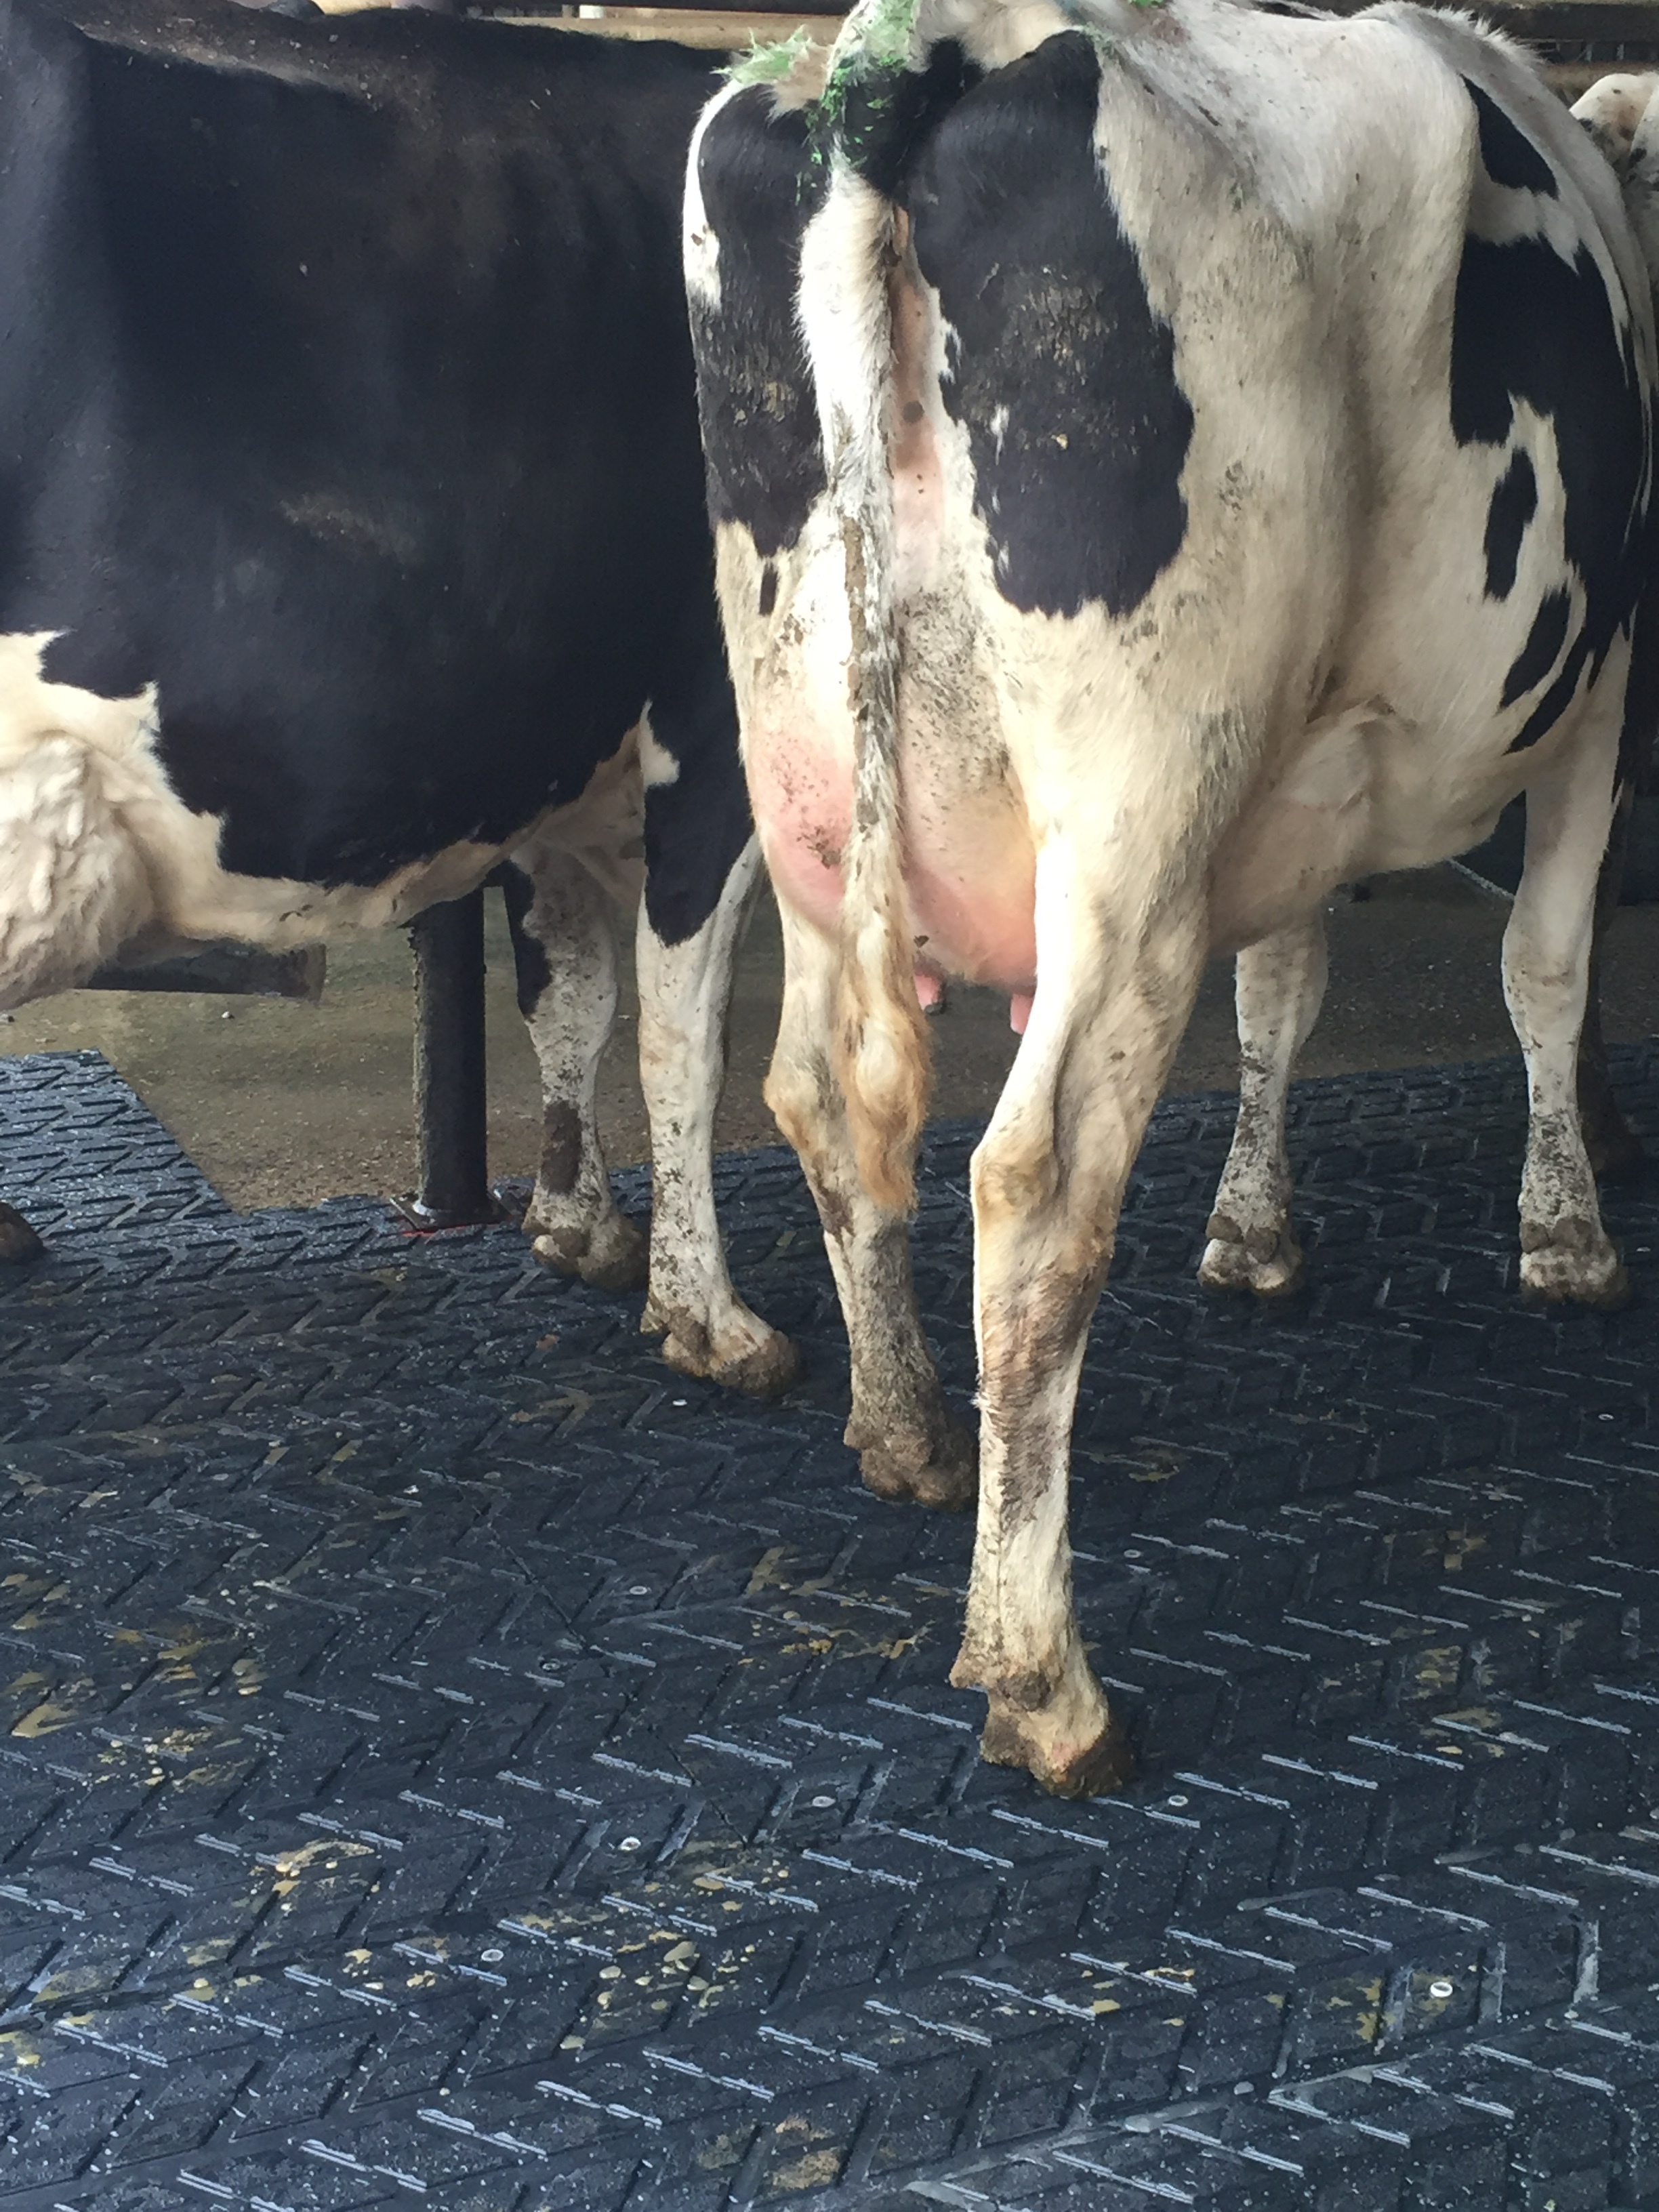
Reduced lameness
Improved animal health and performance
Water saving with flood wash / hose down
Increased cow flow (faster milking time)
Increased heat detection in yard
Improved employee safety and comfort underfoot
Easy wash water flow pattern
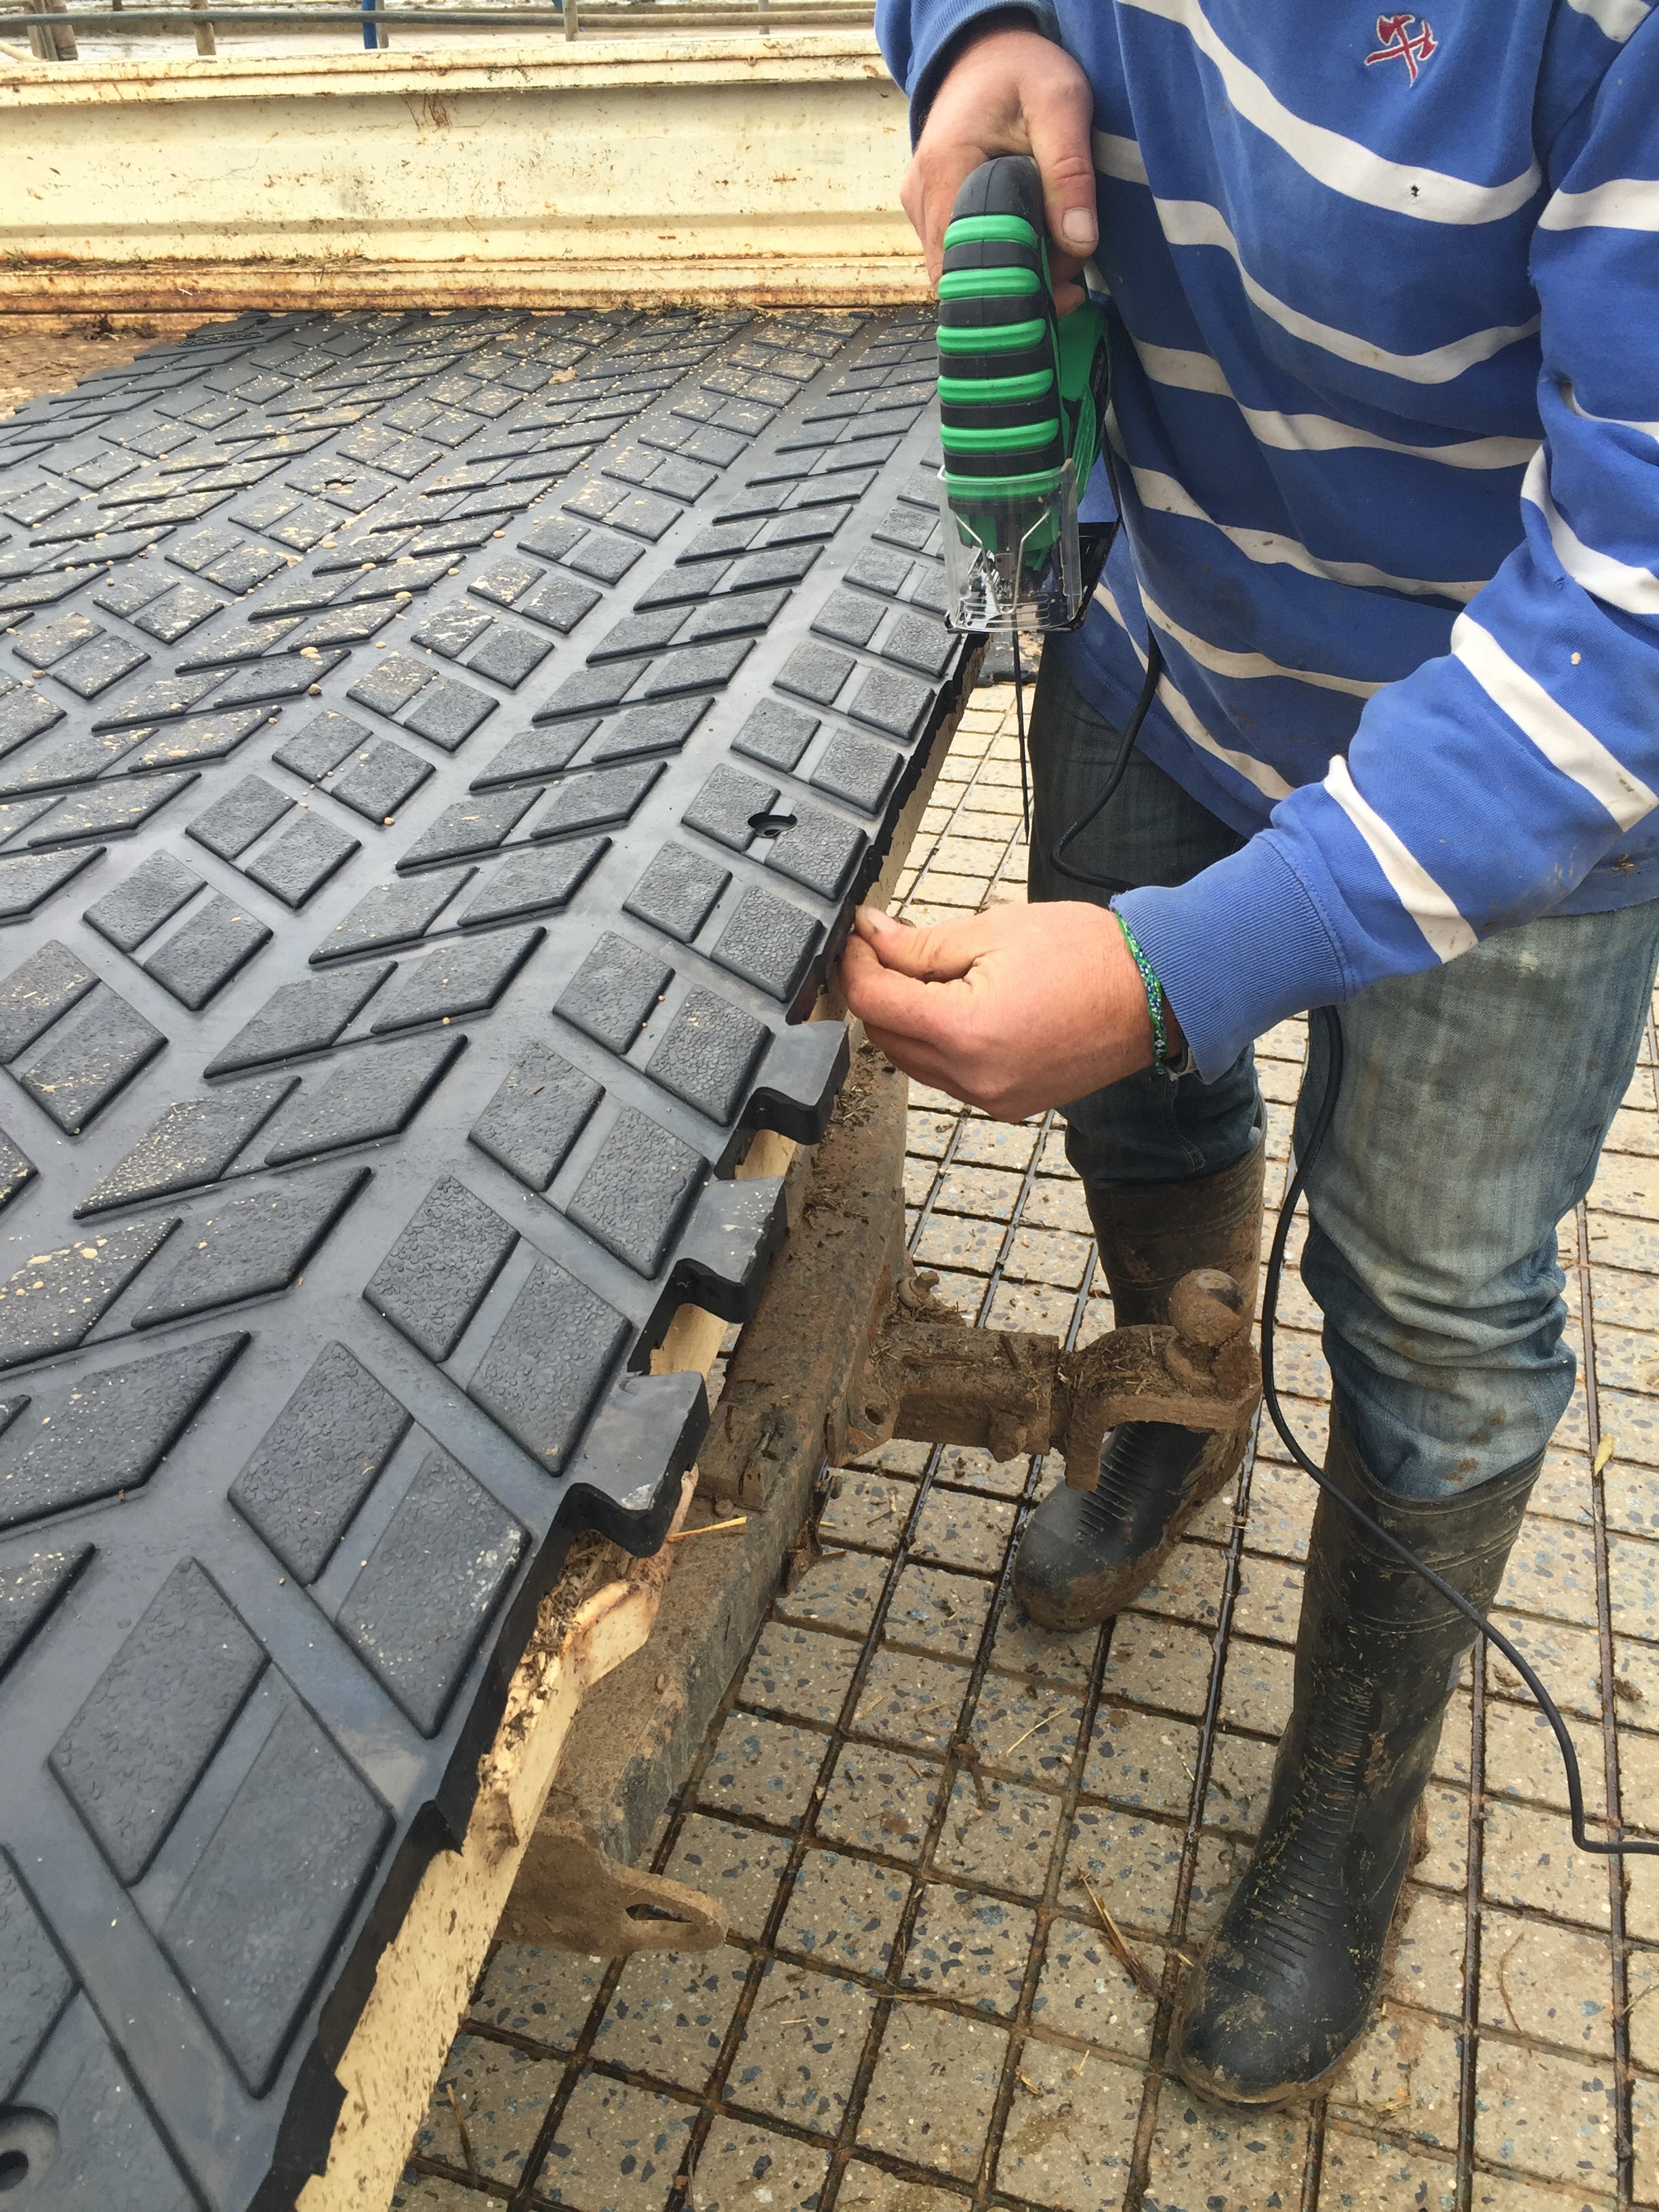
DIY easy install and uninstall (reversible screws)

Matox Testimonials:

"We're saving around 15 minutes on every milking due to improved cow flow. In addition, wash down time and water use has declined dramatically
The significant reduction in lameness and slipovers has seen herd health and production improve".
Justin Rendell, Australian Consolidated Dairies, Kyabram
Milking 850 cows twice per day, and an elite herd of 400 cows, three times a day

"We've tried a lot of mats, and find this mat extremely durable, high grip, easy to wash, and soft underfoot".
Bruce and Sam Holloway, Mepunga, Western Districts, Vic
Milking 400 cows twice per day
Matox Specifications:
Matox Performa Grip
1800mm long x 900mm wide
MPA quality rating - 10+
Thickness - 25mm
Long edge interlocking
Nylon interweave
Top surface "feather channel pattern"
Stud underside surface
Counter sunk screw fixing pattern
Fixings
12 x stainless steel 316 marine grade screw with plugs and washers (included)

Matox Installation Guide:
Step 1: Site Preparation Tips
Ideally, concrete thickness should be 50mm or greater
Repair any damaged concrete
Start with a washed down, clean concrete surface
When laying mats, make note of water flow direction during flood wash and hose down
Step 2: Tool Selection Tips
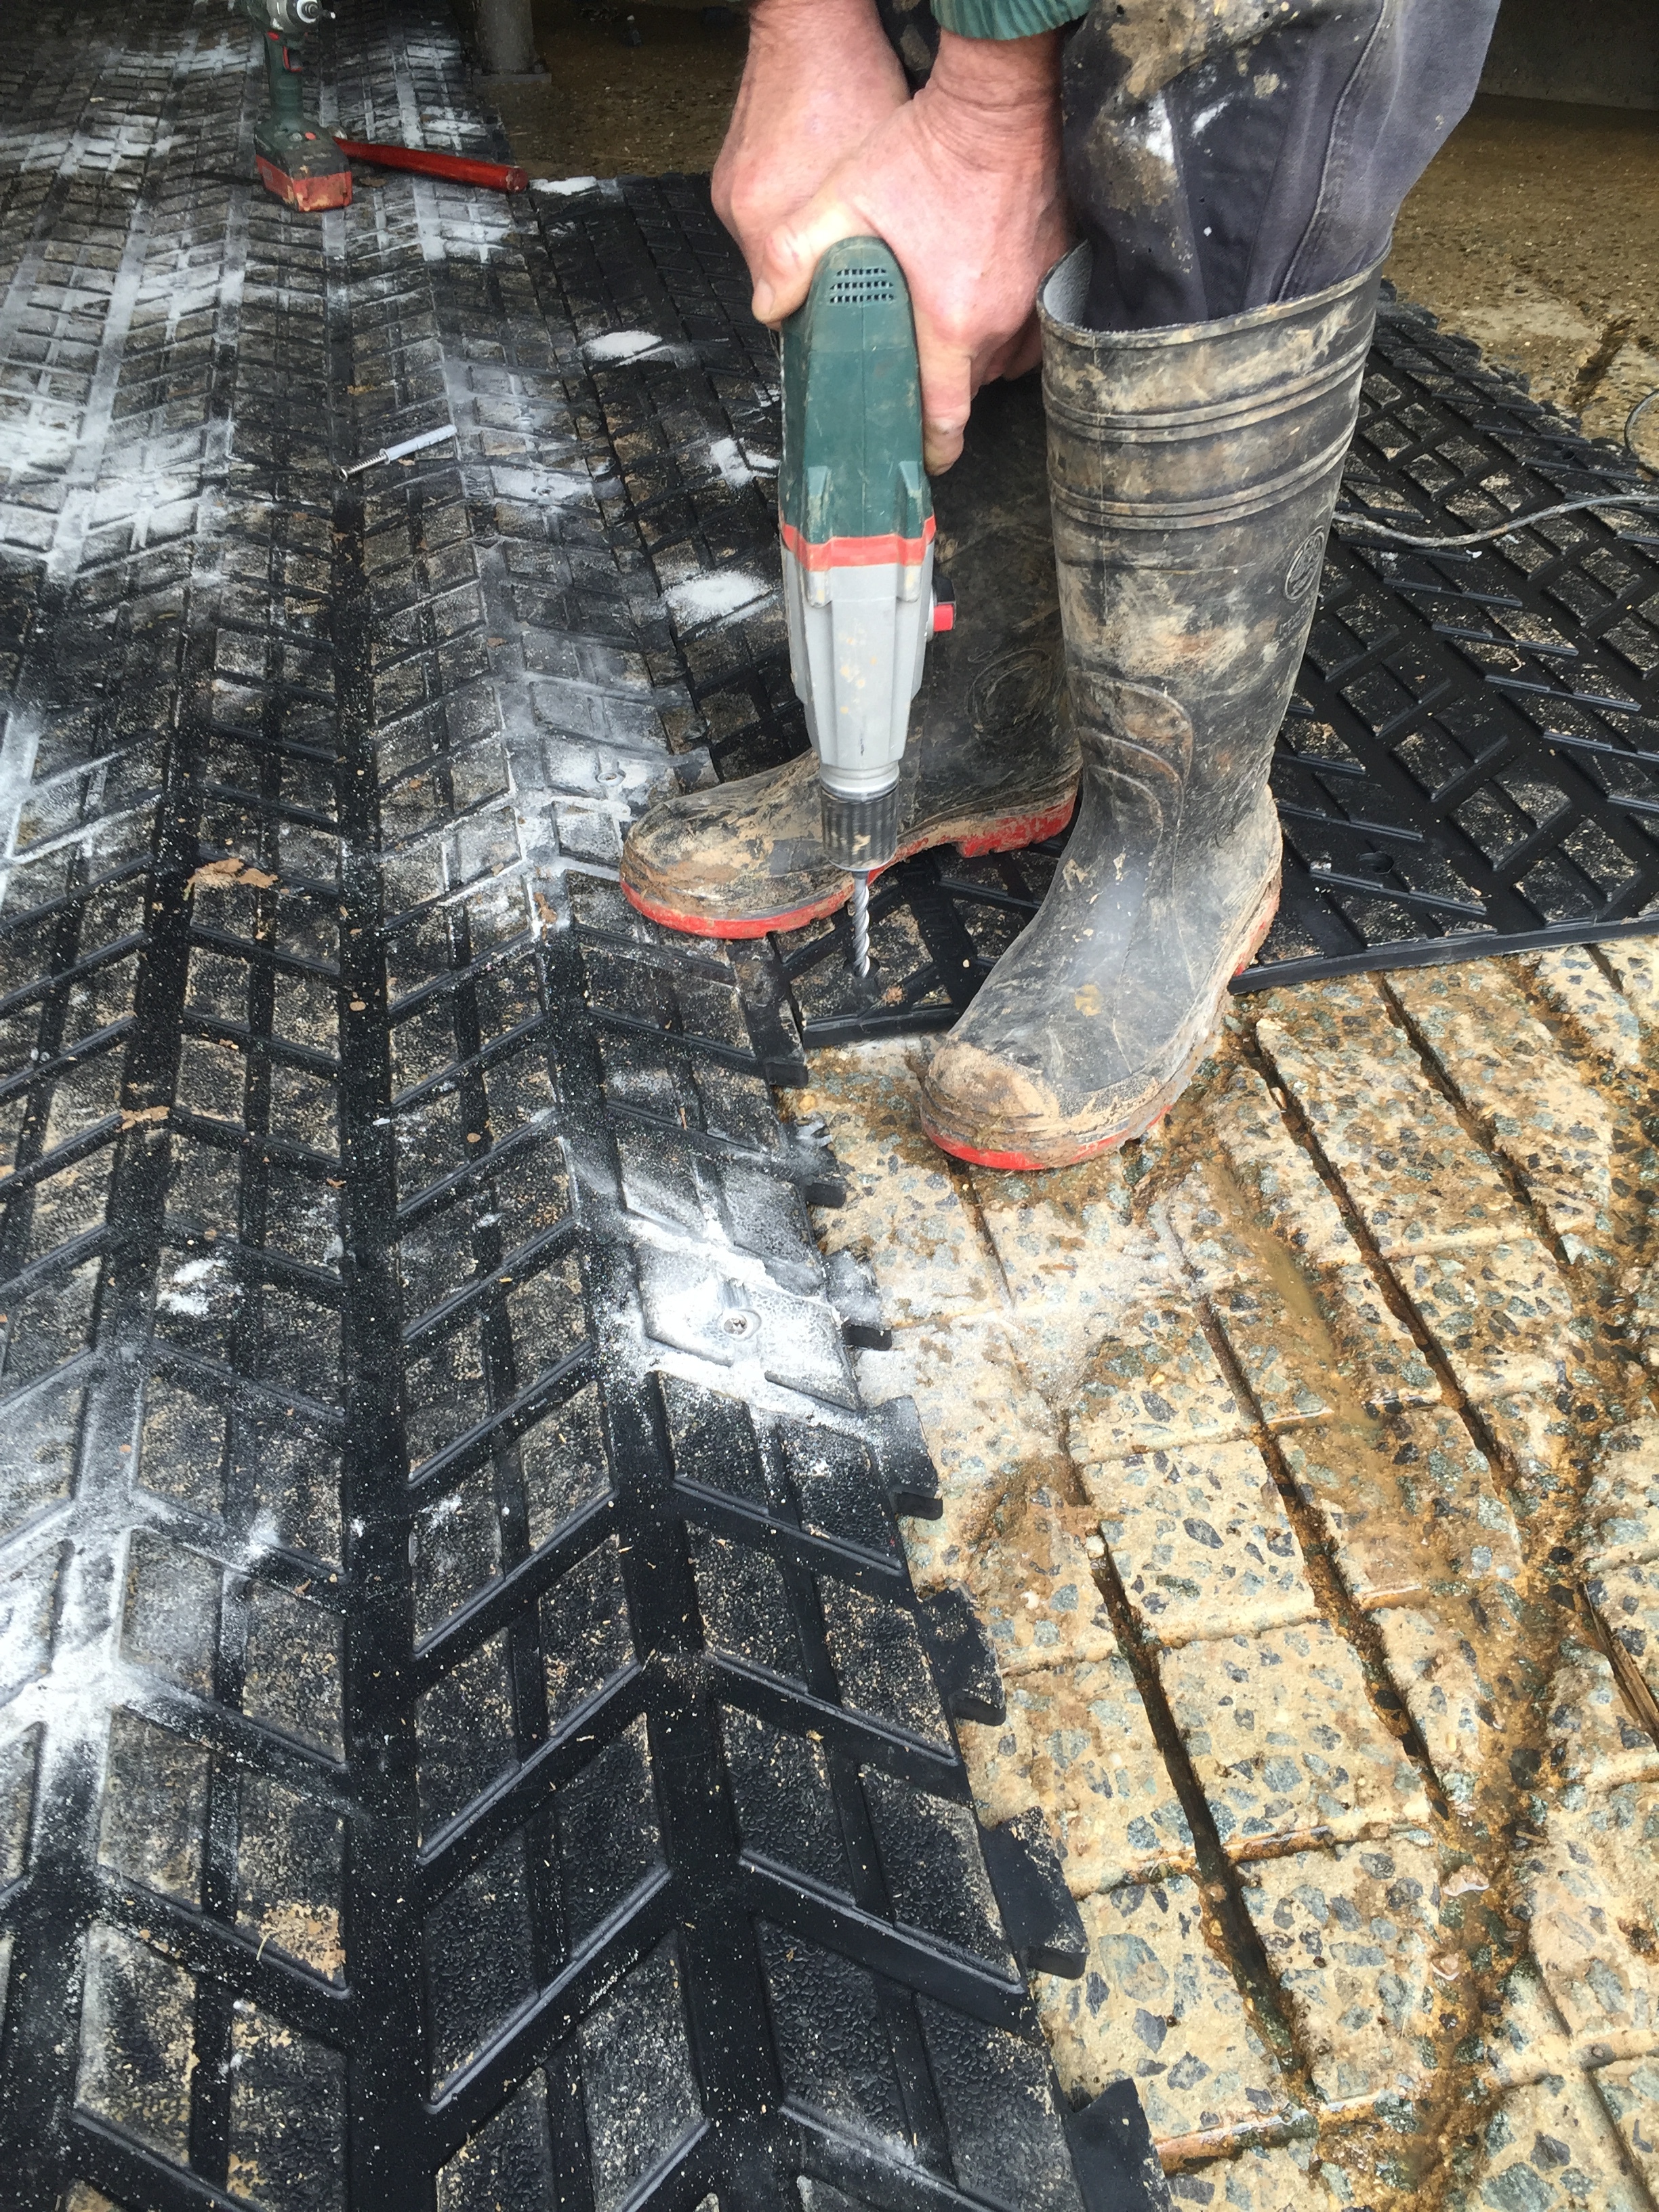
For screw bit, use a torx head T20 (6 point star shaped pattern)
Use high powered drill suitable for drilling and screwing into concrete
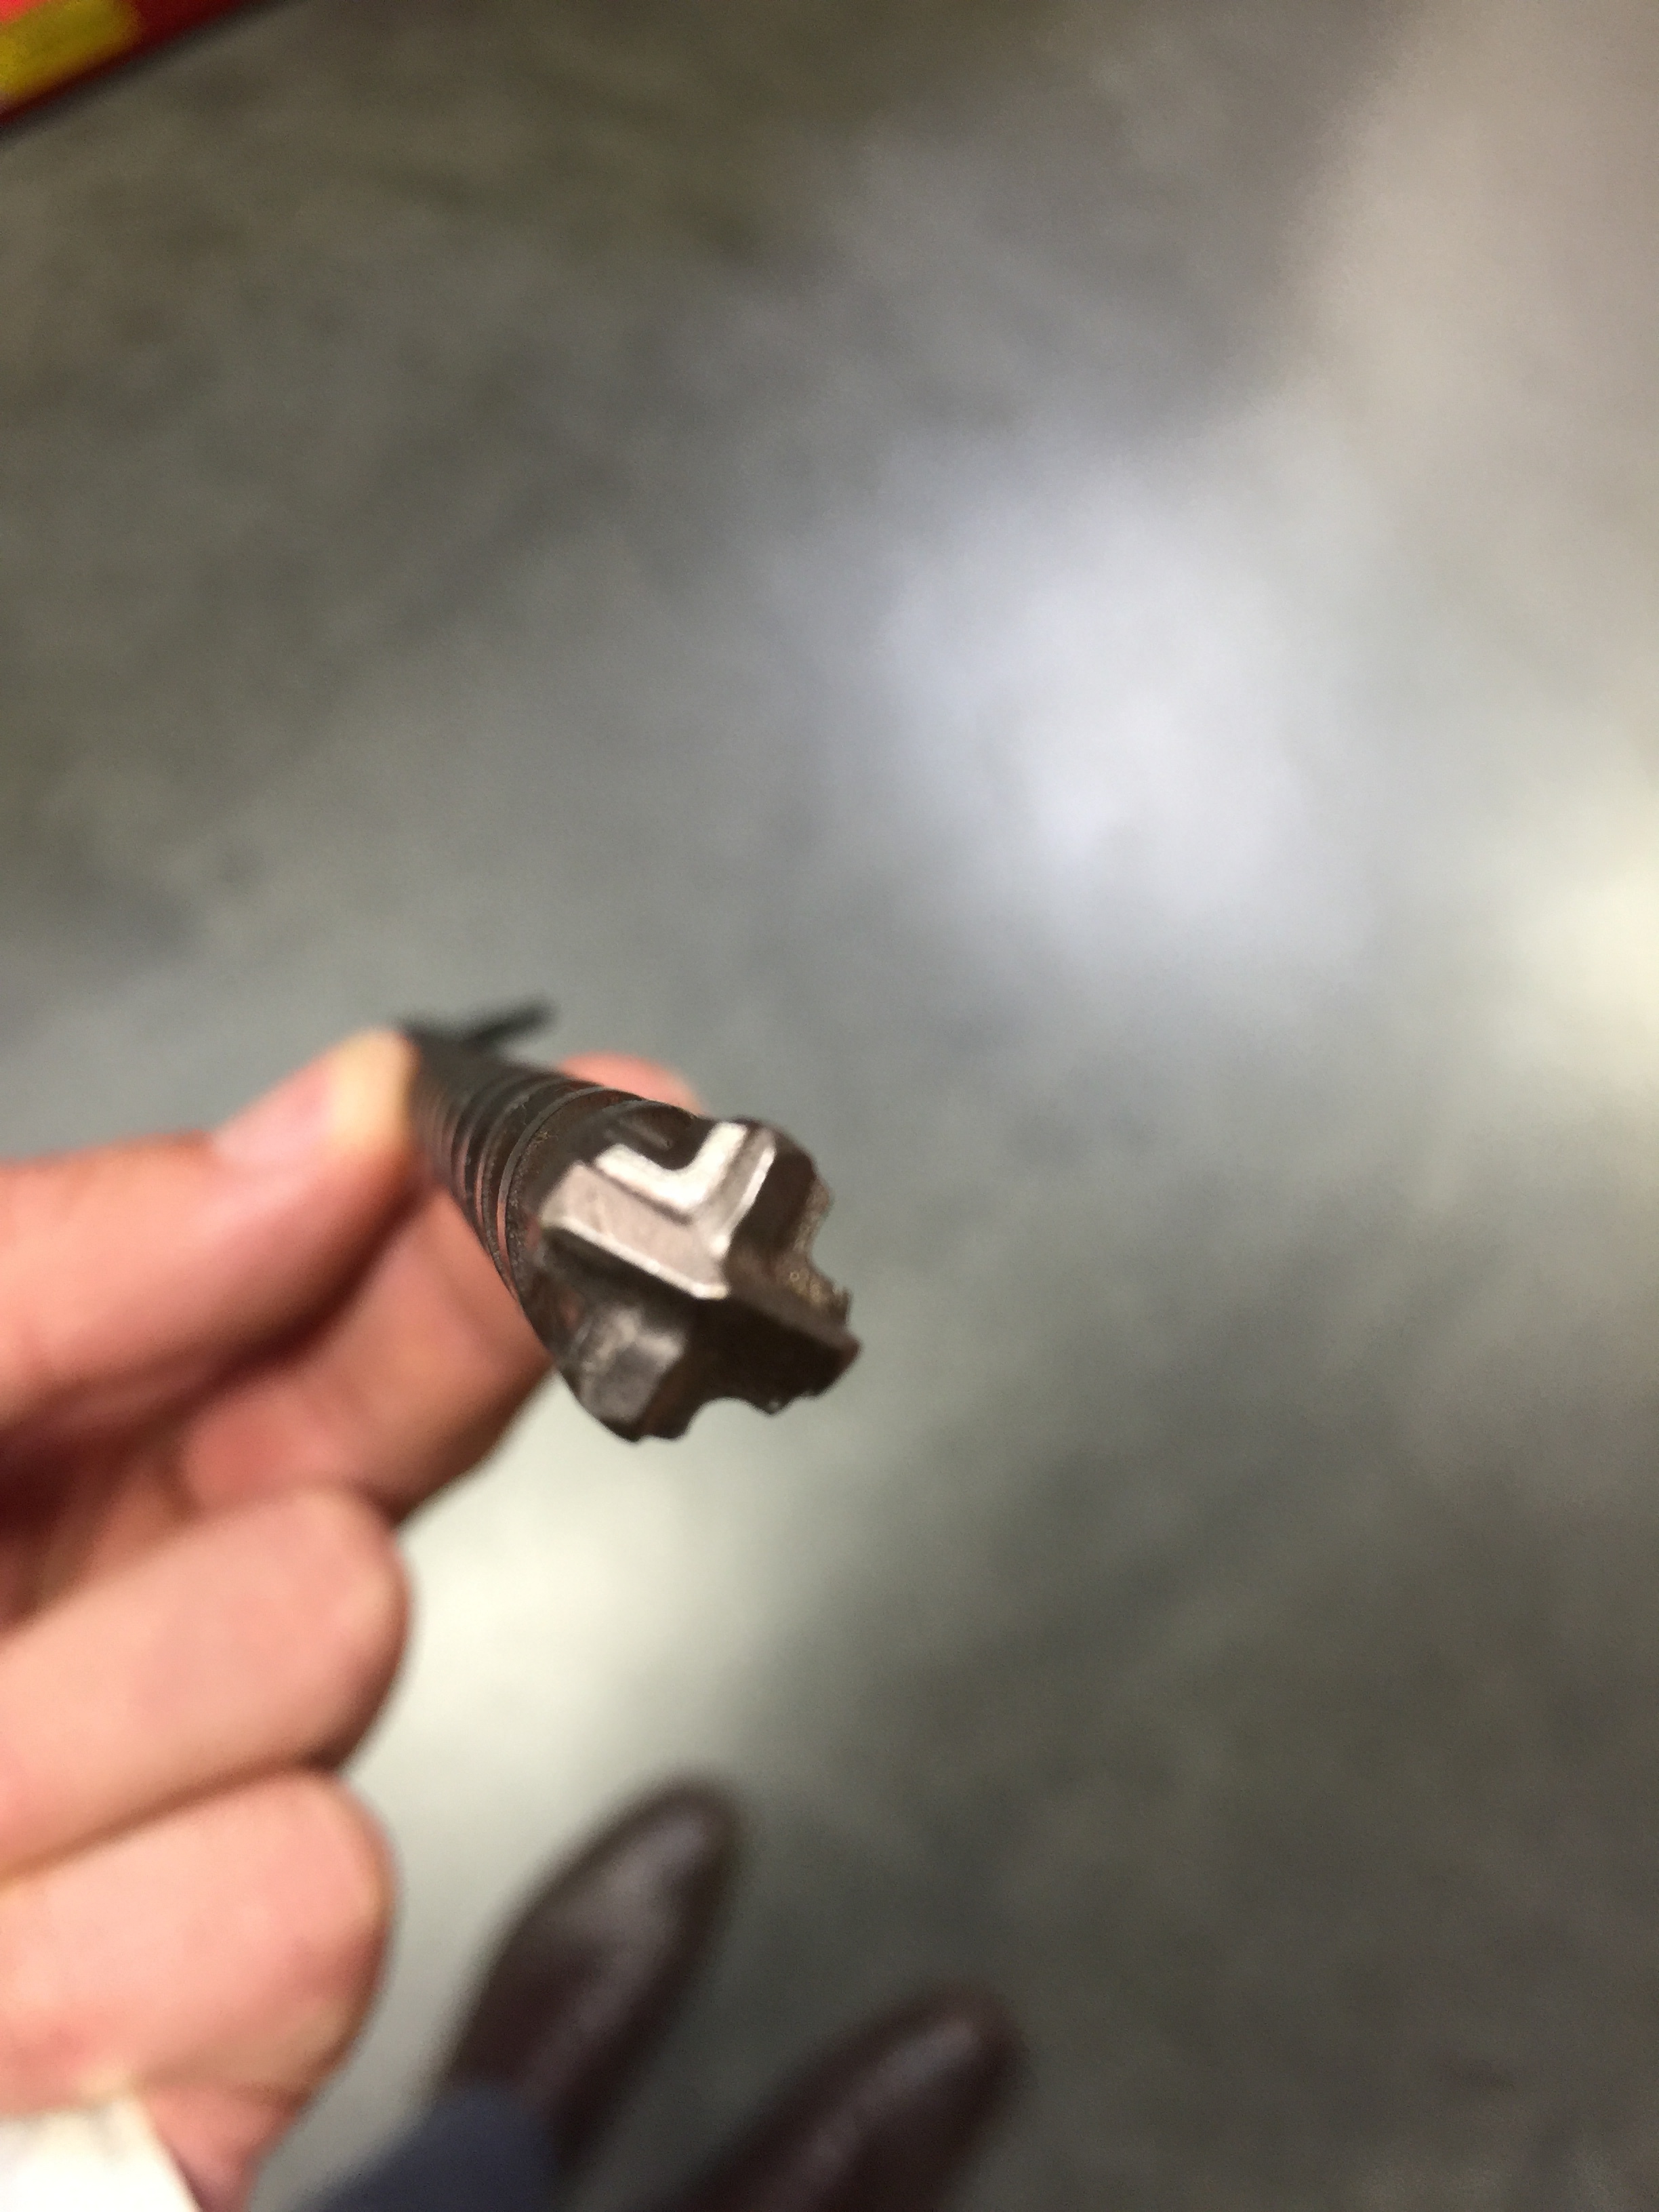
Concrete drill bit with four cutting tips. 10mm diameter x minimum working depth of 125mm
For shaping / cutting rubber, a Bosch soft material cutting blade T313AW/HCS is recommended. Alternatively, use a medium teeth hand saw
Step 3: Laying The Mat
Ideally, lay mats in brick formation making note of water flow indicator arrows
Fix top edge of the mats initially. Allow to acclimatise in layed position for 24 hours before fixing remaining mats
Ideally, fix mats during the warmest part of the day
When boring and screwing mats down, work down from the top of the pattern
Do not fix outside mats first or random mats down the pattern
To uninstall mats, simply reverse the drill

To request a sample, please fill out the below form
